Blog

  • mongoose-fuzzy-searching

    Mongoose Fuzzy Searching

    mongoose-fuzzy-searching is simple and lightweight plugin that enables fuzzy searching in documents in MongoDB. This code is based on this article.

    Build Status codecov License: MIT FOSSA Status

    Features

    Install

    Install using npm

    $ npm i mongoose-fuzzy-searching

    or using yarn

    $ yarn add mongoose-fuzzy-searching

    Getting started

    Initialize plugin

    Before starting, for best practices and avoid any issues, handle correctly all the Deprecation Warnings.

    In order to let the plugin create the indexes, you need to set useCreateIndex to true. The below example demonstrates how to connect with the database.

    const options = {
      useNewUrlParser: true,
      useUnifiedTopology: true,
      useFindAndModify: false,
      useCreateIndex: true,
    };
    
    mongoose.Promise = global.Promise;
    return mongoose.connect(URL, options);

    In the below example, we have a User collection and we want to make fuzzy searching in firstName and lastName.

    const { Schema } = require('mongoose');
    const mongoose_fuzzy_searching = require('mongoose-fuzzy-searching');
    
    const UserSchema = new Schema({
      firstName: String,
      lastName: String,
      email: String,
      age: Number,
    });
    
    UserSchema.plugin(mongoose_fuzzy_searching, { fields: ['firstName', 'lastName'] });
    const User = mongoose.model('User', UserSchema);
    module.exports = { User };
    const user = new User({ firstName: 'Joe', lastName: 'Doe', email: 'joe.doe@mail.com', age: 30 });
    
    try {
      await user.save(); // mongodb: { ..., firstName_fuzzy: [String], lastName_fuzzy: [String] }
      const users = await User.fuzzySearch('jo');
    
      console.log(users);
      // each user object will not contain the fuzzy keys:
      // Eg.
      // {
      //   "firstName": "Joe",
      //   "lastName": "Doe",
      //   "email": "joe.doe@mail.com",
      //   "age": 30,
      //   "confidenceScore": 34.3 ($text meta score)
      // }
    } catch (e) {
      console.error(e);
    }

    The results are sorted by the confidenceScore key. You can override this option.

    try {
      const users = await User.fuzzySearch('jo').sort({ age: -1 }).exec();
      console.log(users);
    } catch (e) {
      console.error(e);
    }

    Plugin options

    Options can contain fields and middlewares.

    Fields

    Fields attribute is mandatory and should be either an array of Strings or an array of Objects.

    String field

    If you want to use the default options for all your fields, you can just pass them as a string.

    const mongoose_fuzzy_searching = require('mongoose-fuzzy-searching');
    
    const UserSchema = new Schema({
      firstName: String,
      lastName: String,
      email: String,
    });
    
    UserSchema.plugin(mongoose_fuzzy_searching, { fields: ['firstName', 'lastName'] });
    Object field

    In case you want to override any of the default options for your arguments, you can add them as an object and override any of the values you wish. The below table contains the expected keys for this object.

    key type default description
    name String null Collection key name
    minSize Integer 2 N-grams min size. Learn more about N-grams
    weight Integer 1 Denotes the significance of the field relative to the other indexed fields in terms of the text search score. Learn more about index weights
    prefixOnly Boolean false Only return ngrams from start of word. (It gives more precise results)
    escapeSpecialCharacters Boolean true Remove special characters from N-grams.
    keys Array[String] null If the type of the collection attribute is Object or [Object] (see example), you can define which attributes will be used for fuzzy searching

    Example:

    const mongoose_fuzzy_searching = require('mongoose-fuzzy-searching');
    
    const UserSchema = new Schema({
      firstName: String,
      lastName: String,
      email: String,
      content: {
          en: String,
          de: String,
          it: String
      }
      text: [
        {
          title: String,
          description: String,
          language: String,
        },
      ],
    });
    
    UserSchema.plugin(mongoose_fuzzy_searching, {
      fields: [
        {
          name: 'firstName',
          minSize: 2,
          weight: 5,
        },
        {
          name: 'lastName',
          minSize: 3,
          prefixOnly: true,
        },
        {
          name: 'email',
          escapeSpecialCharacters: false,
        },
        {
          name: 'content',
          keys: ['en', 'de', 'it'],
        },
        {
          name: 'text',
          keys: ['title', 'language'],
        },
      ],
    });

    Middlewares

    Middlewares is an optional Object that can contain custom pre middlewares. This plugin is using these middlewares in order to create or update the fuzzy elements. That means that if you add pre middlewares, they will never get called since the plugin overrides them. To avoid that problem you can pass your custom midlewares into the plugin. Your middlewares will be called first. The middlewares you can pass are:

    • preSave
      • stands for schema.pre("save", ...)
    • preInsertMany
      • stands for schema.pre("insertMany", ...)
    • preUpdate
      • stands for schema.pre("update", ...)
    • preUpdateOne
      • stands for schema.pre("updateOne", ...)
    • preFindOneAndUpdate
      • stands for schema.pre("findOneAndUpdate", ...)
    • preUpdateMany
      • stands for schema.pre("updateMany", ...)

    If you want to add any of the middlewares above, you can add it directly on the plugin.

    const mongoose_fuzzy_searching = require('mongoose-fuzzy-searching');
    
    const UserSchema = new Schema({
      firstName: String,
      lastName: String,
    });
    
    UserSchema.plugin(mongoose_fuzzy_searching, {
      fields: ['firstName'],
      middlewares: {
        preSave: function () {
          // do something before the object is saved
        },
      },
    });

    Middlewares can also be asynchronous functions:

    const mongoose_fuzzy_searching = require('mongoose-fuzzy-searching');
    
    const UserSchema = new Schema({
      firstName: String,
      lastName: String,
    });
    
    UserSchema.plugin(mongoose_fuzzy_searching, {
      fields: ['firstName'],
      middlewares: {
        preUpdateOne: async function {
          // do something before the object is updated (asynchronous)
        }
      }
    });

    Query parameters

    The fuzzy search query can be used either as static function, or as a helper, which let’s you to chain multiple queries together. The function name in either case is surprise, surprise, fuzzySearch.

    Instance method

    Instance method can accept up to three parameters. The first one is the query, which can either be either a String or an Object. This parameter is required. The second parameter can either be eiter an Object that contains any additional queries (e.g. age: { $gt: 18 }), or a callback function. If the second parameter is the queries, then the third parameter is the callback function. If you don’t set a callback function, the results will be returned inside a Promise.

    The below table contains the expected keys for the first parameter (if is an object)

    key type deafult description
    query String null String to search
    minSize Integer 2 N-grams min size.
    prefixOnly Boolean false Only return ngrams from start of word. (It gives more precise results) the prefix
    exact Boolean false Matches on a phrase, as opposed to individual terms

    Example:

    /* With string that returns a Promise */
    User.fuzzySearch('jo').then(console.log).catch(console.error);
    
    /* With additional options that returns a Promise */
    User.fuzzySearch({ query: 'jo', prefixOnly: true, minSize: 4 })
      .then(console.log)
      .catch(console.error);
    
    /* With additional queries that returns a Promise */
    User.fuzzySearch('jo', { age: { $gt: 18 } })
      .then(console.log)
      .catch(console.error);
    
    /* With string and a callback */
    User.fuzzySearch('jo', (err, doc) => {
      if (err) {
        console.error(err);
      } else {
        console.log(doc);
      }
    });
    
    /* With additional queries and callback */
    User.fuzzySearch('jo', { age: { $gt: 18 } }, (err, doc) => {
      if (err) {
        console.error(err);
      } else {
        console.log(doc);
      }
    });

    Query helper

    You can also use the query is a helper function, which is like instance methods but for mongoose queries. Query helper methods let you extend mongoose’s chainable query builder API.

    Query helper can accept up to two parameters. The first one is the query, which can either be either a String or an Object. This parameter is required. The second parameter can be an Object that contains any additional queries (e.g. age: { $gt: 18 }), which is optional. This helpers doesn’t accept a callback function. If you pass a function it will throw an error. More about query helpers.

    Example:

    const user = await User.find({ age: { $gte: 30 } })
      .fuzzySearch('jo')
      .exec();

    Working with pre-existing data

    The plugin creates indexes for the selected fields. In the below example the new indexes will be firstName_fuzzy and lastName_fuzzy. Also, each document will have the fields firstName_fuzzy[String] and lastName_fuzzy[String]. These arrays will contain the anagrams for the selected fields.

    const mongoose_fuzzy_searching = require('mongoose-fuzzy-searching');
    
    const UserSchema = new Schema({
      firstName: String,
      lastName: String,
      email: String,
      age: Number,
    });
    
    UserSchema.plugin(mongoose_fuzzy_searching, { fields: ['firstName', 'lastName'] });

    In other words, this plugin creates anagrams when you create or update a document. All the pre-existing documents won’t contain these fuzzy arrays, so fuzzySearch function, will not be able to find them.

    Update all pre-existing documents with ngrams

    In order to create anagrams for pre-existing documents, you should update each document. The below example, updates the firstName attribute to every document on the collection User.

    const cursor = Model.find().cursor();
    cursor.next(function (error, doc) {
      const obj = attrs.reduce((acc, attr) => ({ ...acc, [attr]: doc[attr] }), {});
      return Model.findByIdAndUpdate(doc._id, obj);
    });

    Delete old ngrams from all documents

    In the previous example, we set firstName and lastName as the fuzzy attributes. If you remove the firstName from the fuzzy fields, the firstName_fuzzy array will not be removed by the collection. If you want to remove the array on each document you have to unset that value.

    const cursor = Model.find().cursor();
    cursor.next(function (error, doc) {
      const $unset = attrs.reduce((acc, attr) => ({ ...acc, [`${attr}_fuzzy`]: 1 }), {});
      return Model.findByIdAndUpdate(data._id, { $unset }, { new: true, strict: false });
    });

    Testing and code coverage

    All tests

    We use jest for all of our unit and integration tests.

    $ npm test

    Note: this will run all suites serially to avoid mutliple concurrent connection on the db.

    This will run the tests using a memory database. If you wish for any reason to run the tests using an actual connection on a mongo instance, add the environment variable MONGO_DB:

    $ docker run --name mongo_fuzzy_test -p 27017:27017 -d mongo
    $ MONGO_DB=true npm test

    Available test suites

    unit tests

    $ npm run test:unit

    Integration tests

    $ npm run test:integration

    License

    MIT License

    Copyright (c) 2019 Vassilis Pallas

    Permission is hereby granted, free of charge, to any person obtaining a copy of this software and associated documentation files (the “Software”), to deal in the Software without restriction, including without limitation the rights to use, copy, modify, merge, publish, distribute, sublicense, and/or sell copies of the Software, and to permit persons to whom the Software is furnished to do so, subject to the following conditions:

    The above copyright notice and this permission notice shall be included in all copies or substantial portions of the Software.

    THE SOFTWARE IS PROVIDED “AS IS”, WITHOUT WARRANTY OF ANY KIND, EXPRESS OR IMPLIED, INCLUDING BUT NOT LIMITED TO THE WARRANTIES OF MERCHANTABILITY, FITNESS FOR A PARTICULAR PURPOSE AND NONINFRINGEMENT. IN NO EVENT SHALL THE AUTHORS OR COPYRIGHT HOLDERS BE LIABLE FOR ANY CLAIM, DAMAGES OR OTHER LIABILITY, WHETHER IN AN ACTION OF CONTRACT, TORT OR OTHERWISE, ARISING FROM, OUT OF OR IN CONNECTION WITH THE SOFTWARE OR THE USE OR OTHER DEALINGS IN THE SOFTWARE.

    FOSSA Status

    Visit original content creator repository https://github.com/VassilisPallas/mongoose-fuzzy-searching
  • nlp-sentiment-toxicity

    NLP Sentiment & Toxicity Analysis Toolkit

    A comprehensive NLP toolkit for multi-language sentiment analysis, toxicity detection, and text detoxification using state-of-the-art language models.

    Project Introduction

    This toolkit provides a set of modular NLP tools designed to:

    1. Detect languages in text using FastText
    2. Translate non-English text to English for unified analysis
    3. Analyze sentiment (positive/negative/mixed) with detailed explanations
    4. Detect toxic content with contextual understanding
    5. Detoxify text by rewriting toxic content in a polite, constructive manner

    The system is designed to handle batch processing of text datasets with robust error handling, caching, and adaptive prompting to optimize results from language models.

    Project Structure

    nlp-sentiment-toxicity/
    ├── src/                   # Source code
    │   ├── __init__.py        # Package initialization
    │   ├── main.py            # Entry point
    │   ├── config.py          # Configuration settings
    │   ├── models.py          # Model loading utilities
    │   ├── language_utils.py  # Language detection and translation
    │   ├── text_processor.py  # Text processing and batch handling
    │   ├── data_processor.py  # Data processing functions
    │   ├── analysis.py        # Core analysis functions
    │   ├── sentiment.py       # Sentiment analysis module
    │   ├── toxicity.py        # Toxicity detection and detoxification
    │   ├── processing.py      # Text preprocessing and rule-based processing
    │   └── output_parser.py   # Output parsing and fixing
    │
    ├── tests/                 # Test modules
    │   ├── __init__.py        # Test package initialization
    │   ├── test_config.py     # Test configuration
    │   ├── test_sentiment.py  # Sentiment analysis tests
    │   ├── test_toxicity.py   # Toxicity analysis tests
    │   └── run_all_tests.py   # Test runner
    │
    ├── models/                # Stores model files
    │   └── lid.176.bin        # FastText language identification model
    │
    ├── data/                  # Input datasets
    │   ├── multilingual-sentiment-test-solutions.csv
    │   └── toxic-test-solutions.csv
    │
    ├── output/                # Results output directory
    │   └── ...                # Generated result files
    │
    ├── test_output/           # Test results and logs
    │   ├── logs/              # Test log files
    │   └── ...                # Test output files
    │
    └── README.md              # Project documentation

    Technologies Used

    • Python 3.8+: Core programming language
    • PyTorch: Deep learning framework for model inference
    • Transformers (Hugging Face): For accessing and using pre-trained models
    • FastText: For language detection
    • LangChain: For agent-based processing and tool integration
    • Pandas: For data manipulation and CSV processing
    • Ollama: For accessing lightweight LLMs
    • Logging: For comprehensive tracking and debugging

    Models

    The toolkit uses several specialized models:

    1. Language Detection: FastText’s lid.176.bin model (supports 176 languages)
    2. Translation: UBC-NLP/toucan-base (Multilingual MT5-based model)
    3. Sentiment & Toxicity Analysis: ibm-granite/granite-3.0-2b-instruct (Instruction-tuned LLM)
    4. Agent-based Processing: llama3.2:1b via Ollama (Local lightweight LLM)

    Each model is used for its specific strengths to create a robust pipeline for text analysis.

    Setup and Running

    Prerequisites

    • Python 3.8 or higher
    • CUDA-compatible GPU (recommended for faster processing)
    • Ollama installed locally (for agent-based processing)

    Installation

    1. Clone the repository:

      git clone https://github.com/yourusername/nlp-sentiment-toxicity.git
      cd nlp-sentiment-toxicity
    2. Create and activate a virtual environment:

      python -m venv venv
      source venv/bin/activate  # On Windows: venv\Scripts\activate
    3. Install dependencies:

      pip install torch pandas tqdm transformers fasttext langchain-ollama
    4. Download required models:

      # FastText language model needs to be downloaded manually to models/ directory
      mkdir -p models
      curl -o models/lid.176.bin https://dl.fbaipublicfiles.com/fasttext/supervised-models/lid.176.bin
    5. Set up Ollama (if not already installed):

      # Follow instructions at https://ollama.ai/
      # Then pull the required model
      ollama pull llama3.2:1b

    Running the Main Program

    To process the datasets:

    python -m src.main

    This will:

    1. Load all required models
    2. Process sentiment analysis on multilingual data
    3. Process toxicity analysis and detoxification
    4. Save results to the output/ directory

    Running Tests

    To run individual tests:

    cd tests  # Go to the tests directory first
    python test_sentiment.py  # For sentiment analysis tests
    python test_toxicity.py   # For toxicity analysis tests

    To run all tests:

    cd tests  # Go to the tests directory first
    python run_all_tests.py

    Test results will be saved in the test_output/ directory with timestamped filenames, and logs will be stored in test_output/logs/.

    Configuration

    Key configuration settings can be adjusted in src/config.py, including:

    • Model paths
    • Input/output file paths
    • Processing parameters (retries, delay between requests)
    • Device selection (CUDA/CPU)

    Performance Notes

    • Processing large datasets may take significant time
    • GPU acceleration is strongly recommended for optimal performance
    • The system includes caching to avoid reprocessing identical texts
    • Adaptive prompting improves reliability with large language models
    • Direct function implementations ensure independence between sentiment and toxicity analysis

    New Features and Improvements

    • Enhanced Sentiment Analysis: Improved sentiment analysis templates and output parsing to avoid confusion with toxicity analysis
    • Optimized Toxicity Detection: Added direct function implementations for better toxicity detection accuracy
    • Improved Detoxification: Using specialized direct functions for more effective text detoxification
    • Better Logging: Enhanced logging functionality including test run logs
    • Improved Error Handling: Better error handling and fallback mechanisms

    Troubleshooting

    Import Errors in Tests

    If you encounter import errors when running tests, make sure to:

    1. Run tests from the test directory: Always navigate to the tests directory before running test scripts

      cd tests
      python test_sentiment.py
    2. Python Module Path: If you’re running tests as modules with -m, make sure you’re in the project root directory:

      # From project root
      PYTHONPATH=. python -m tests.test_sentiment  # Linux/Mac
      set PYTHONPATH=. && python -m tests.test_sentiment  # Windows
    3. Missing Modules: If you see errors about missing modules, ensure you’ve installed all dependencies:

      pip install -r requirements.txt  # If available
      # or manually install required packages
      pip install torch pandas tqdm transformers fasttext langchain-ollama

    TensorFlow Warnings

    If you see warnings like:

    I tensorflow/core/util/port.cc:153] oneDNN custom operations are on. You may see slightly different numerical results...

    These are informational messages from TensorFlow about optimizations. The code already contains fixes to suppress these messages, but if they still appear, you can:

    1. Additional Environment Variables: Set these environment variables before running your script:

      # Linux/Mac
      export TF_ENABLE_ONEDNN_OPTS=0
      export TF_CPP_MIN_LOG_LEVEL=2
      
      # Windows
      set TF_ENABLE_ONEDNN_OPTS=0
      set TF_CPP_MIN_LOG_LEVEL=2
    2. Run with Python Flag: Use the -W flag to ignore warnings:

      python -W ignore test_sentiment.py
    3. Alternative TensorFlow Installation: Consider installing the CPU-only version of TensorFlow if you’re not using its GPU features:

      pip uninstall tensorflow
      pip install tensorflow-cpu

    Visit original content creator repository
    https://github.com/arnozeng98/nlp-sentiment-toxicity

  • tri-api

    Project Tour

    tri-api

    Multi-API Data Display is an open-source web application that fetches information from three different APIs and displays the data on separate pages. Each API provides unique data sets, allowing users to explore diverse content within the same application.

    Features

    • Feature 1: An IMDB API, where one can fetch all data about entertainment.
    • Feature 2: A Cars API, where one can fetch all data about cars and its functioning.
    • Feature 3: A Currency API, where one can convert one currency to another.

    Folder Structure

    • 1: The component folder would contain all the different user made components.
    • 2: All folders other than the Home and Navbar would contain a file, where one would use the ‘axios.create()’ method on the API and export it to the other folder, where it would be fetched.
    • 3: The home page folder would contain the home page component.
    • 4: The navbar folder would contain the navbar component.
    • 5: Note that strongly recommend the contributor to make more files in these folders and use atomic component to ‘increase code readability’.
    • 6: Note that the contributor should use ‘axios.create()’ to fetch the API as it would be more suitable in fetching the given API.

    API links

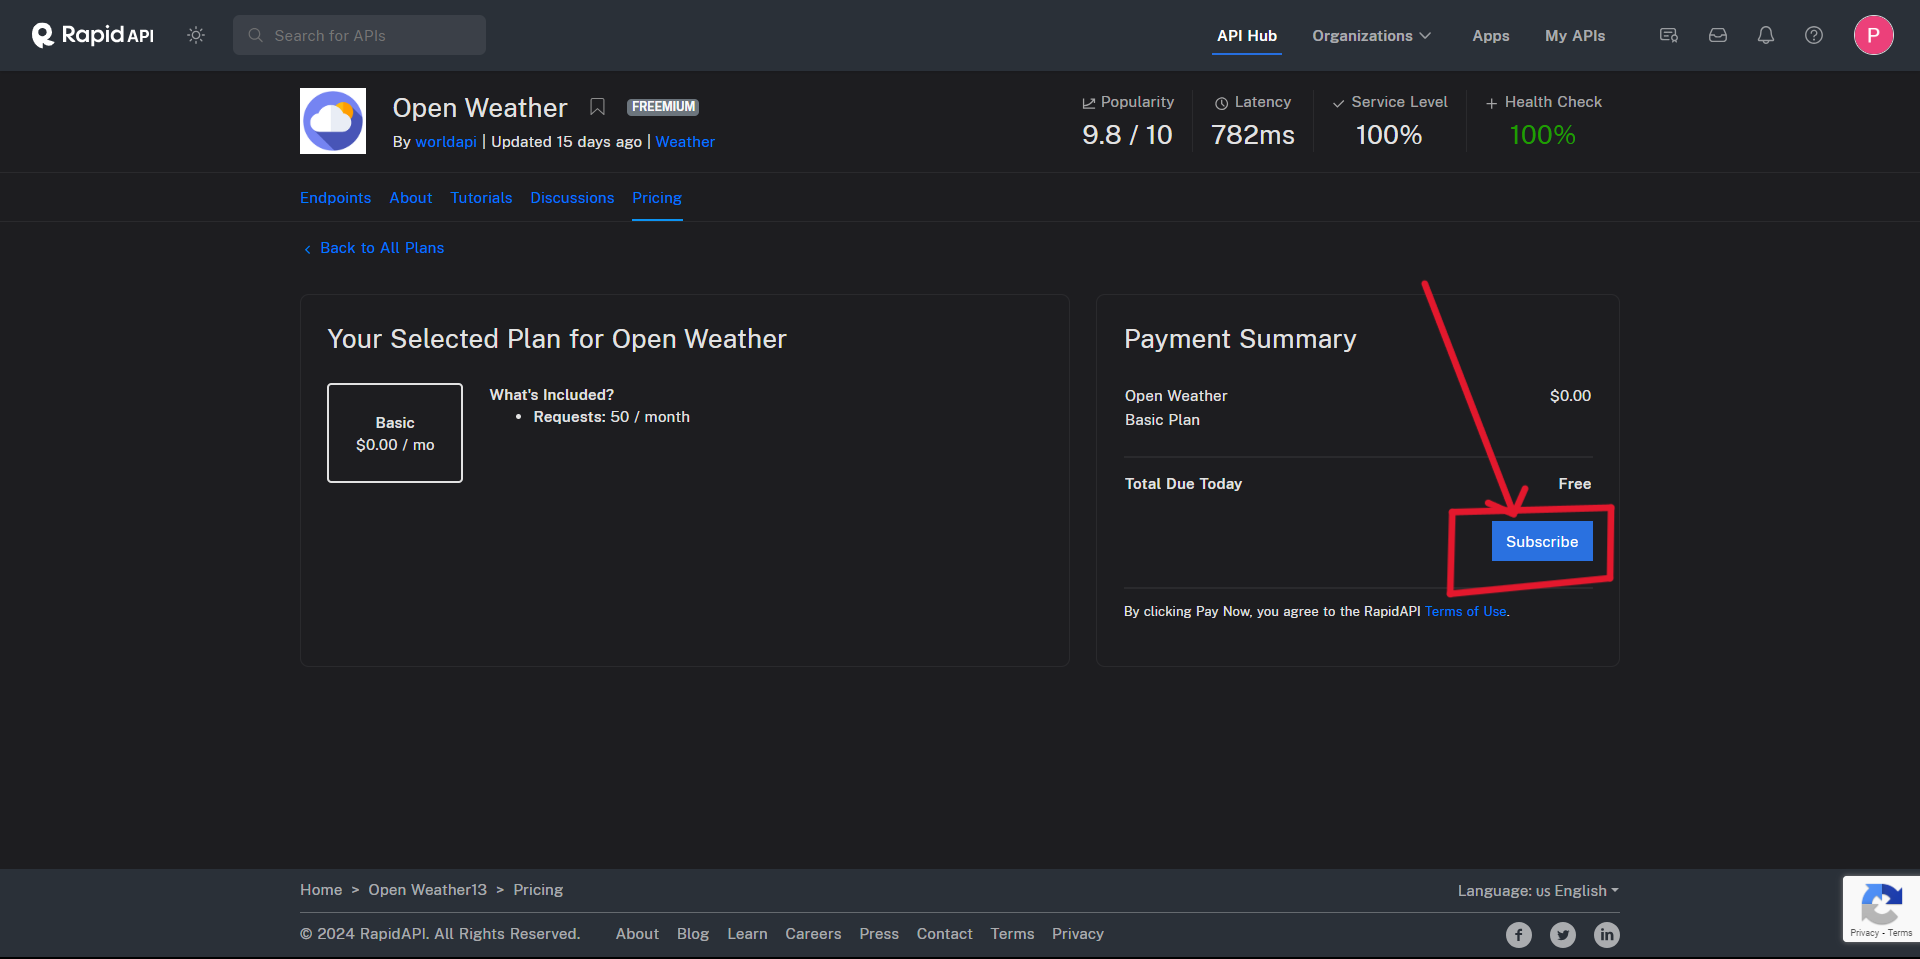
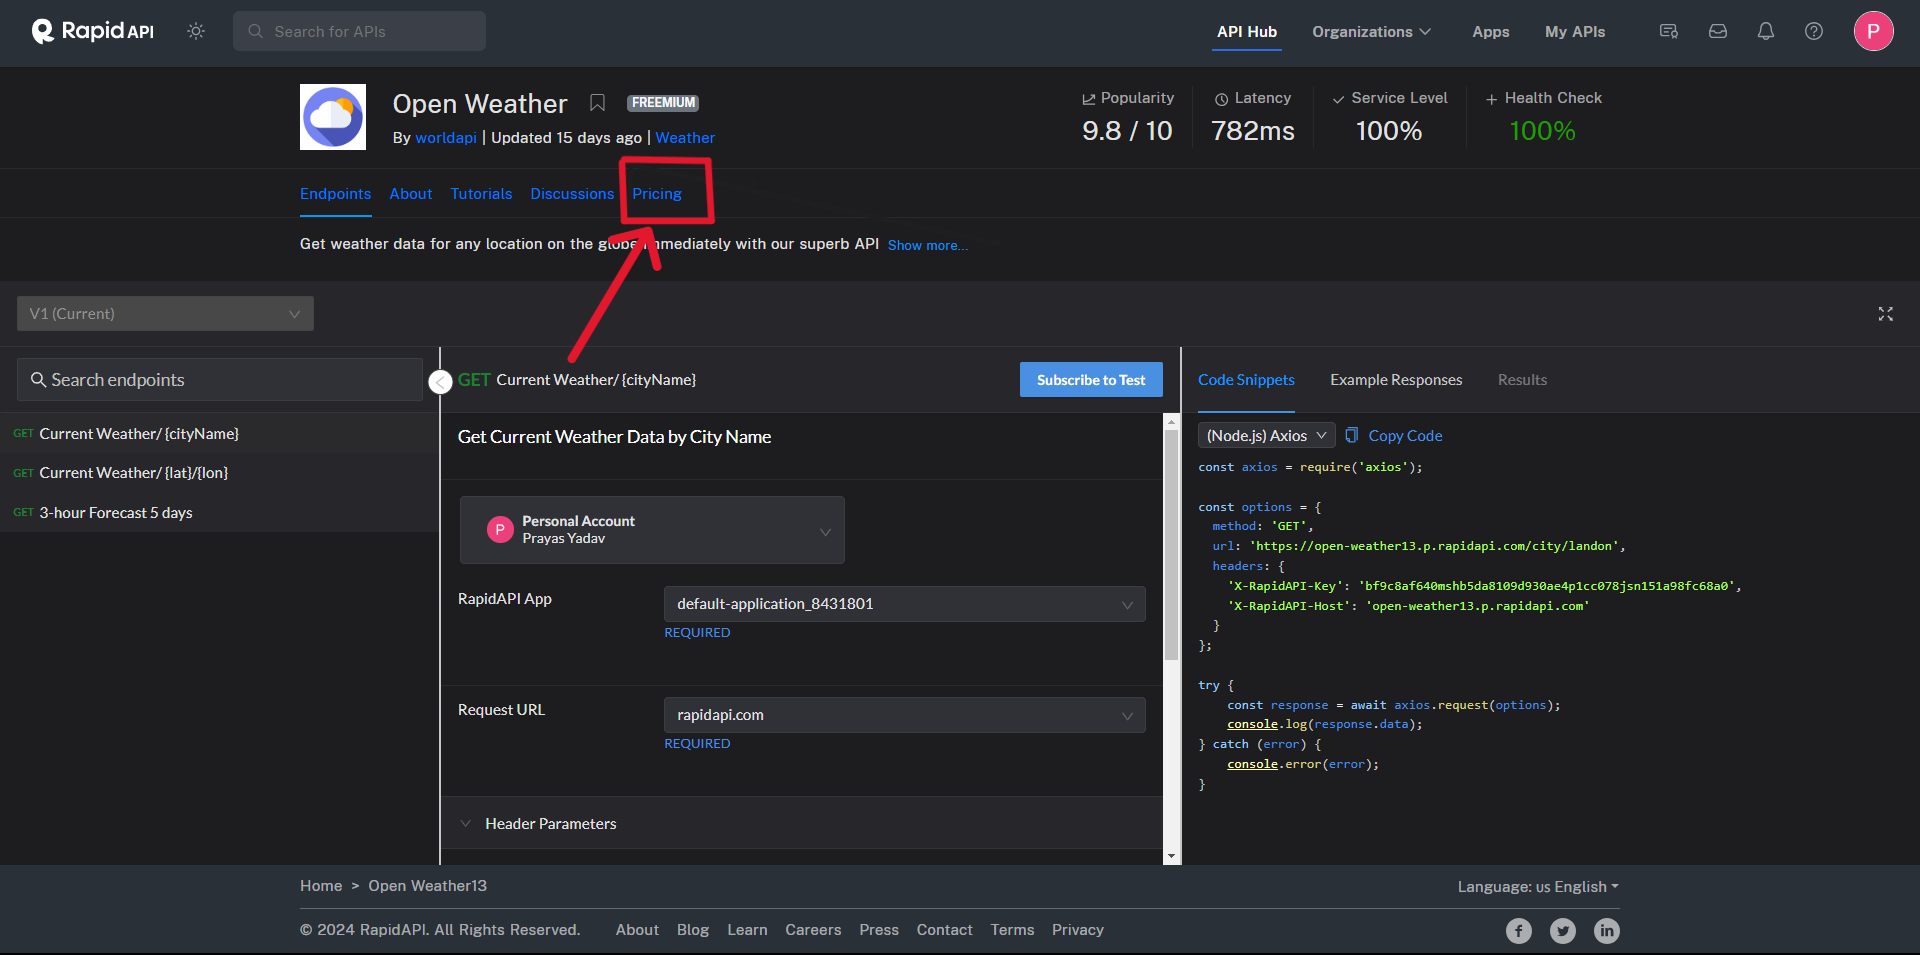
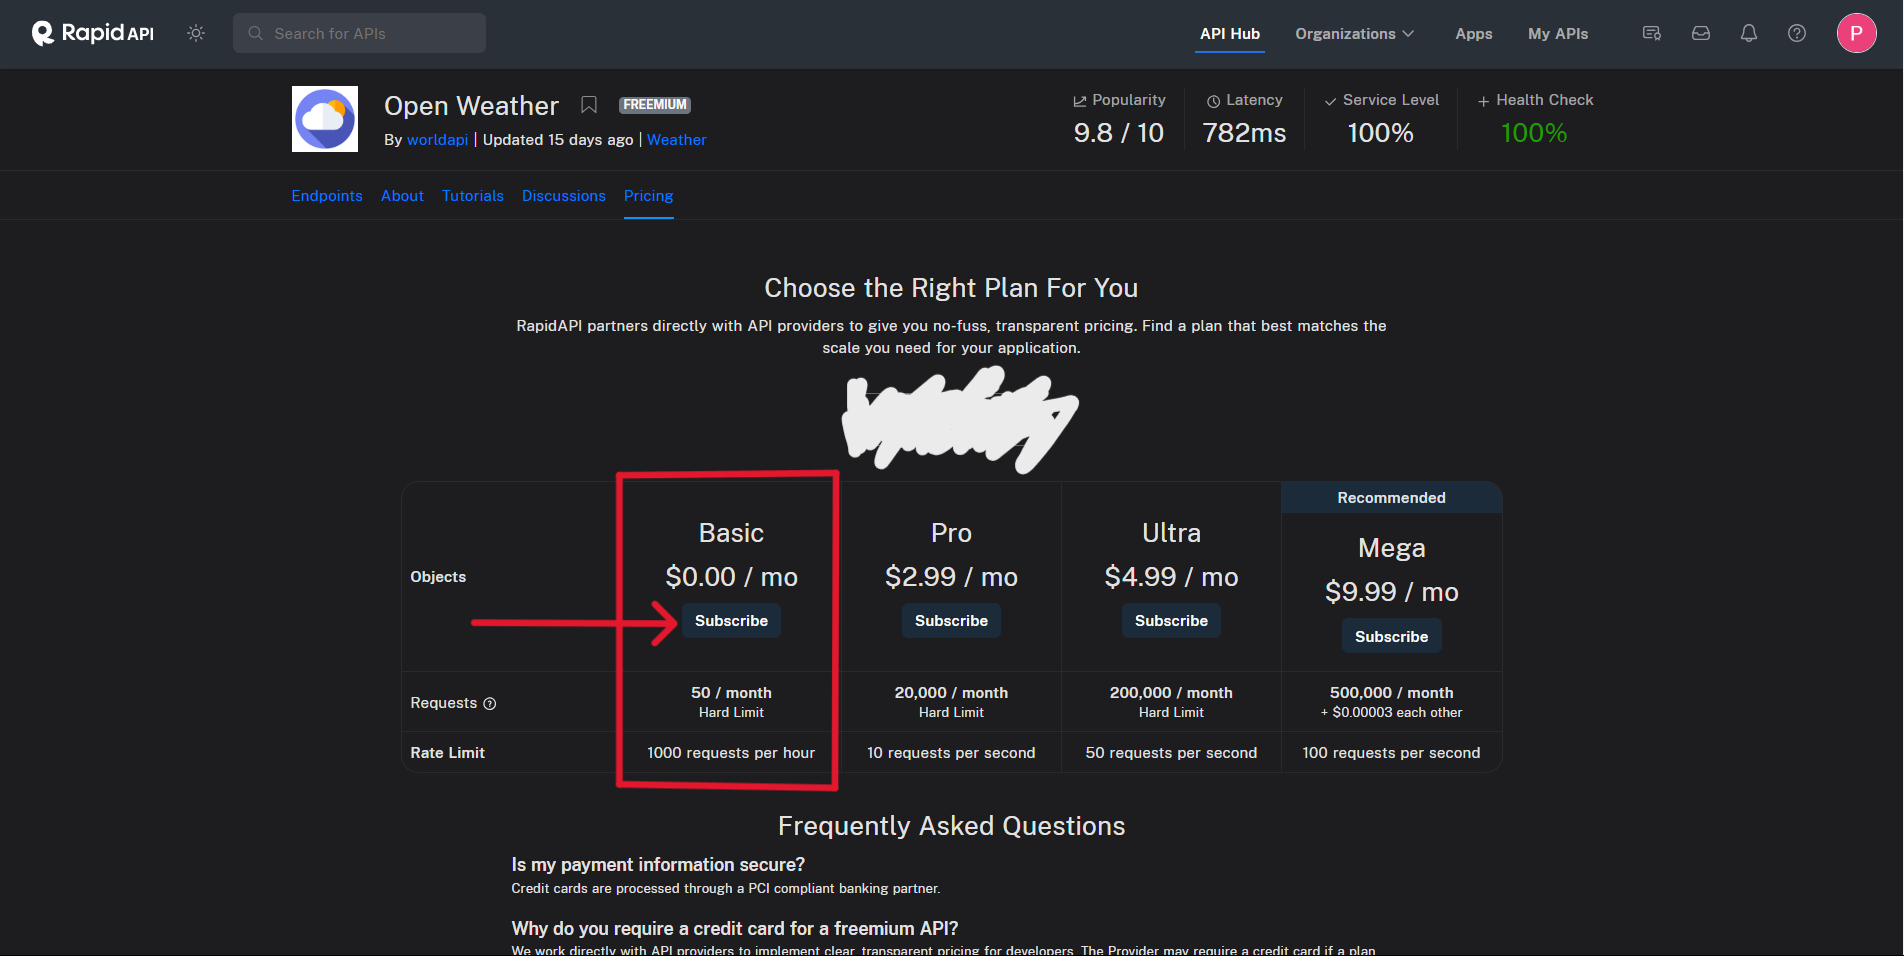
    How to use these API?

    Before using the API, follow these steps that were performed on a Dummy API.

    First Image

    Second Image

    Third Image

    Only After performing the above three steps one can use these APIs.

    Contributing

    We welcome contributions from the community! If you’d like to contribute to this project, please follow these steps:

    1. Fork the repository.
    2. Create a new branch for your feature or bug fix.
    3. Make your changes and commit them.
    4. Push to the branch.
    5. Submit a pull request.

    Please ensure that you clarify and discuss about the issue with me before sending me a pull request, so that the issue is solved in a correct manner.

    Please ensure that your code follows the project’s coding standards and conventions, and include tests if applicable. Your pull request will be reviewed by the maintainers, and we’ll get back to you as soon as possible.

    Visit original content creator repository https://github.com/OPCODE-Open-Spring-Fest/tri-api
  • Doctor-Patient-Appointment-System

    Doctor-Patient Appointment System

    Abstract

    The objective of the project is to create an “Online Doctor-Patient Appointment System” web app as a part of my internship at “TechVariable Pvt Ltd.”.

    The Doctor-Patient Appointment System is a digital platform designed to streamline and simplify the process of scheduling and managing appointments between doctors and patients. This system aims to enhance communication and convenience for doctors and patients, ultimately improving the healthcare experience. This project is an EHR project being developed at TechVariable.

    The Doctor-Patient Appointment System allows patients to easily get register, create a profile and add their medical records. They can easily search for doctors based on their names specialty, location, and availability. They can see the details of the doctors. Once a suitable doctor is selected, patients can request an appointment at their preferred date and visiting location of the doctor. The patient can easily see the history of the appointment and their status.

    Doctors, on the other hand, benefit from an organized and automated appointment system. They can update their profile and update their availability status. They are also allowed to add multiple visiting locations and visiting hours for those locations. Upon receiving the appointment, the doctor can confirm, or cancel it. After checking the patient on the day of the appointment doctor can mark the appointment as complete. Each update on the status of the appointment is sent to the respective patient through email. The doctor is provided with an easy-to-use interface and a short summary of current-day appointment statistics.

    This system segregates the current-day appointments and arranges them in different segments making the work of doctors more convenient.

    By implementing the Doctor-Patient Appointment System, healthcare institutions can optimize their appointment scheduling processes, reduce administrative burdens, and enhance patient satisfaction. Patients can access quality healthcare services easily, while doctors can efficiently manage their schedules and provide personalized care. Overall, this system aims to foster a seamless doctor-patient relationship and improve healthcare access for all.

    KEYWORD: Python, Django, Postgresql, SMTP, Tailwind CSS, HTML, Multi-threading.

    INDEX

    1. Introduction
    • 1.1 Problem Statement
    • 1.2 Objectives
    1. Initial System Study
    2. Feasibility Analysis
    3. System Analysis
    4. System Requirement Specification
    5. Language and Tools being used
    6. System Design
    • 7.1 System Architecture
    • 7.2 Database Schema
    • 7.3 Data Flow Diagram
    1. Testing
    2. Results and Discussion
    3. Conclusion & Future work
    4. Bibliography

    Visit original content creator repository
    https://github.com/dev-vivekkumarverma/Doctor-Patient-Appointment-System

  • dscommerce-api

    DSCommerce API

    DSCommerce API é uma API robusta e versátil que atende às necessidades tanto de administradores quanto de clientes, para o gerenciamento de um sistema comercial. Oferece recursos como autenticação de usuário, perfis de usuário, gerenciamento de produtos com categorias, geração de ordem de compra e consulta. Foi utilizado o framework do Java o Spring, Spring Web, para gerenciamento do web server, Spring Data JPA para manipulação de informações dos bancos de dados MySQL e H2 Database. Para segurança e autenticação foi utilizado tecnologias como OAuth2 Resource Server, JWT e BCrypt.

    Flow

    📒 Índice

    📃 Descrição

    DSCommerce API é uma API robusta e versátil que atende às necessidades tanto de administradores quanto de clientes, para o gerenciamento de um sistema comercial. Oferece recursos como autenticação de usuário, perfis de usuário, gerenciamento de produtos com categorias, geração de ordem de compra e consulta. Foi utilizado o framework do Java o Spring, Spring Web, para gerenciamento do web server, Spring Data JPA para manipulação de informações dos bancos de dados MySQL e H2 Database. Para segurança e autenticação foi utilizado tecnologias como OAuth2 Resource Server, JWT e BCrypt com a utilização da criptografia do tipo RSA.

    📌 Requisitos Funcionais

    • Autenticação de usuário
    • Perfis de cliente e administrador associados ao usuário
    • Cadastramento de produtos e categoria pertencente, por usuário com perfil de administrador
    • Listagem de produtos
    • Consulta de um produto especifico
    • Atualização de informações de produtos, por usuário com perfil de administrador
    • Deleção de um produto especifico, por usuário com perfil de administrador
    • Listagem de todas as categorias
    • Gerar ordem de compra, por usuário com perfil de cliente
    • Consulta de ordem de compra especifica, por usuário com perfis cliente e administrador

    Features

    • Autenticação de usuário utilizando OAuth2, chave RSA e JWT Token
    • Exibição de informações do próprio usuário em sessão ativa
    • Status para as ordens: AGUARDANDO PAGAMENTO, PAGO, ENVIADO, ENTREGUE, CANCELADO
    • Adicionando mapeamento de CORS
    • Modelo de domínio complexo
    • Projeção com SQL nativo
    • Ambientes diferentes de desenvolvimento: DEV, TEST, PROD

    💻 Tecnologias

    • Java
    • Spring
    • Spring Web
    • Spring Boot DevTools
    • Spring Data JPA
    • OAuth2 Resource Server
    • RSA
    • JWT
    • BCrypt
    • MySQL
    • H2 Database

    📍 Endpoints

    Método Endpoint Resumo Autenticação Role
    POST /oauth2/token Responsável por autenticar usuário e gerar o Bearer Token JWT. Utiliza o Basic Auth e o corpo de requisição do tipo x-www-form-urlencoded com as chaves: username, password e grant_type Sim *
    GET /users/me Responsável por listar as informações do usuário que esta na sessão Sim ROLE_ADMIN, ROLE_CLIENT
    GET /products Responsável por listar todos os produtos Não *
    GET /products/:id Responsável por exibir um produto especifico por seu ID Não *
    POST /products Responsável por cadastrar um produto Sim ROLE_ADMIN
    PUT /products/:id Responsável por atualizar um produto, informando o ID no Path e via corpo de requisição as informações Sim ROLE_ADMIN
    PUT PUT /products/:id Responsável por deletar um produto, informando o ID no Path Sim ROLE_ADMIN
    GET /categories Responsável por listar todos as categorias Não *
    POST /orders Responsável por gerar uma ordem de uma compra Sim ROLE_CLIENT
    GET /orders/:id Responsável por listar os produtos na ordem de uma compra especifica e seu status, informando o ID Sim ROLE_ADMIN, ROLE_CLIENT
    GET /h2-console Responsável por acesso ao H2 Database Sim *

    🚀 Instalação

      # Clone este repositório:
      $ git clone https://github.com/CleilsonAndrade/dscommerce-api.git
      $ cd ./dscommerce-api
    
      # Instalar as dependências:
      $ mvn clean install
    
      # Executar:
      $ mvn spring-boot:run

    📝 Licença

    Esse projeto está sob a licença MIT. Veja o arquivo LICENSE para mais detalhes.


    Feito com 💜 by CleilsonAndrade

    Visit original content creator repository https://github.com/CleilsonAndrade/dscommerce-api
  • sanic-docs-zh

    Sanic 0.7.0 中文文档

    License Sanic Version

    Sanic 是一个类似 Flask 的 Python 3.5+ Web 服务框架,在这篇文章的启发下,由一群来自 magicstack 的开发人员完成的,编写出来的目的是为了提供更高的执行效率。

    除了有着类似 Flask 风格之外,Sanic 还支持异步请求处理。这就意味着你可以使用 Python 3.5 中新的 async/await 语法来编写出非阻塞并且执行速度更快的代码。

    Sanic 在 GitHub 上进行开发。欢迎贡献代码!

    If you have a project that utilizes Sanic make sure to comment on the issue that we use to track those projects!

    Hello World

    from sanic import Sanic
    from sanic.response import json
    
    app = Sanic()
    
    @app.route("https://github.com/")
    async def test(request):
        return json({"hello": "world"})
    
    if __name__ == "__main__":
        app.run(host="0.0.0.0", port=8000)

    安装

    • pip install sanic

    To install sanic without uvloop or ujson using bash, you can provide either or both of these environmental variables using any truthy string like ‘y’, ‘yes’, ‘t’, ‘true’, ‘on’, ‘1’ and setting the NO_X to true will stop that features installation.

    • SANIC_NO_UVLOOP=true SANIC_NO_UJSON=true pip install sanic

    示例

    • Non-Core examples. Examples of plugins and Sanic that are outside the scope of Sanic core.
    • Extensions. Sanic extensions created by the community.
    • Projects. Sanic in production use.

    平台限制

    • No wheels for uvloop and httptools on Windows 🙁

    Final Thoughts

                     ▄▄▄▄▄
            ▀▀▀██████▄▄▄       _______________
          ▄▄▄▄▄  █████████▄  /                 \
         ▀▀▀▀█████▌ ▀▐▄ ▀▐█ |   Gotta go fast!  |
       ▀▀█████▄▄ ▀██████▄██ | _________________/
       ▀▄▄▄▄▄  ▀▀█▄▀█════█▀ |/
            ▀▀▀▄  ▀▀███ ▀       ▄▄
         ▄███▀▀██▄████████▄ ▄▀▀▀▀▀▀█▌
       ██▀▄▄▄██▀▄███▀ ▀▀████      ▄██
    ▄▀▀▀▄██▄▀▀▌████▒▒▒▒▒▒███     ▌▄▄▀
    ▌    ▐▀████▐███▒▒▒▒▒▐██▌
    ▀▄▄▄▄▀   ▀▀████▒▒▒▒▄██▀
              ▀▀█████████▀
            ▄▄██▀██████▀█
          ▄██▀     ▀▀▀  █
         ▄█             ▐▌
     ▄▄▄▄█▌              ▀█▄▄▄▄▀▀▄
    ▌     ▐                ▀▀▄▄▄▀
     ▀▀▄▄▀
    

    官方文档 · GitHub · GitBook

    业余翻译,总结自用

    如果发现了文档中的错误或是翻译不正确的地方,欢迎批评指正并提交 PR (ノ◕ヮ◕)ノ*:・゚✧

    如果文档没有及时更新请提交 issue (๑•̀ω•́)ノ


    许可

    Creative Commons Attribution 4.0 International License (CC BY-NC-SA 4.0)

    署名 – 非商业性使用 – 相同方式共享 4.0 国际

    Visit original content creator repository https://github.com/XuToTo/sanic-docs-zh
  • vote

    19931101

    Note: This is really old software, for the old PCC DOS compiler. Examine it carefully for suitability before use. It likely contains bugs.

    VOTE 1.0 – November 1993

    (*) means this item has changed in v1.1. See end of file for details.

    This is a simple voting booth program, meant for use on a BBS system. Spread it if you like. Change whatever you want (but leave my name in there, eh?)

    SETTING UP

    To run it, you first must set up a file called VOTE.DAT(*). You can do that with any text editor. You’ll need at least one vote in the file at all times, if you don’t have one… anything can happen! (But it’ll probably crash the program.)

    The format of the VOTE.DAT file is as follows:

    • question (as many lines as required – note that only 75 characters are read in at a time.)
    • !<- Separator – must be first character. Rest of line is ignored.
    • This is for response number one. Again, as many lines as you need.
    • !<- ‘!’ is the separator again.
    • 0/0 <-number of votes for this option/total votes. Rest of line must be blank
    • Response option number two. The pattern repeats as necessary.
    • !
    • 0/0
    • #<- vote separator. Next vote would go after this.
    • $<- indicates that there are no more votes
    • User #1 – user number, handle, whatever you pass to vote as “user” – CASE SENSITIVE!
    • 0 – a string of binary flags, 1 for each vote. 0=not voted, 1=voted
    • @<- end of file indicator. VERY IMPORTANT!!

    You don’t need to memorize the format, you could enter a file like this just to get things going, and then use the built-in functions after that to update the data file.

    I will delete this later.
    !
    Ok.
    !
    0/0
    #
    $
    no such user, no matter.
    0
    @
    

    Currently the internal buffer allows for a 500 line data file. more later.

    USING IT

    The calling format is: VOTE mode user [path]

    • mode: the mode you are calling VOTE in. The only valid modes(*) are N – for new votes, R – for read results, or S – for sysop. More later.

    • user: the user ID you are using. This could be the handle, a user ID, or any similarly unique code(*)

    • path: is optional. If included, it will use that path to find the VOTE.DAT file. If omitted, current directory is assumed. (*)

    examples:

    • VOTE N FLIPPER – tells VOTE to see if there are any new questions for FLIPPER (case sensitive) to answer. If FLIPPER has not used VOTE before, he will be added, and have to do all the current votes.
    • VOTE r FLIPPER – note that the mode switch is NOT case sensitive, only the user ID. Tells VOTE to enter voting review mode. The user ID is unneeded in review and sysop mode(*), but you need at least two arguments, or VOTE will dump the commandline summary at you
    • VOTE n 015 c:\data\ – tells VOTE to do the new question procedure for user 015 (VOTE will treat the number 015 as a name), and to look for VOTE.DAT at the specified path (C:\DATA\VOTE.DAT). The trailing backslash is required.
    • vote s bossman – enters sysop control mode.

    You get the point, I’m sure.

    MODE N – NEW

    VOTE will first check if the user specified is in it’s data file. If not, it will try to add the username to it’s list (it will check and report if it is out of buffer space.)

    Next it will scan the questions and the user’s data, and bring up each voting question that he has not yet done. If it was a new user, that means all of them. The votes cannot be aborted (as requested!)

    After each vote, the results to date of that vote will be displayed, showing the number of points per response, the total number of votes, and a percentage.

    When all votes are done, VOTE will exit back to the calling program.

    MODE R – REVIEW/RESULTS/REWHATEVER

    No, I can’t really decide for sure what to call this mode. Stop bugging me.

    This mode will ask the user (doesn’t matter what is passed as the username) what vote to start displaying results at. After each display, it will ask for the next result, or quit. If it shows the last vote, or quit is selected, it will return to the prompt asking which vote to start displaying at. If the response to that prompt is a blank (enter, return, whatever), the program will end.

    MODE S – SYSOP

    Again, it doesn’t matter what is passed as a username here(*). VOTE will display a small menu when it starts:

    • [A]dd question – lets you add a new vote to the list. You are told how many lines are free in the buffer. There must be at least 10 to go anywhere. If you overflow the buffer, might as well quit right away, cause the data file will not be saved (to avoid getting corrupted.)
    • [D]elete question – lets you delete a vote, by number. The option is confirmed before it actually occurs. The users are also updated.
    • [E]dit question(*)- in theory, should let you change the text of the question, any response, add a response, delete a response, or zeroize the results. In practice, I didn’t implement it. If anyone really wants it, I’ll think about it. (Assuming, of course, this program goes anywhere beyond Feral’s BBS)
    • [L]ist questions – will list the first line of each question and it’s corresponding number, so you can know which one to delete (and potentially, some day, edit.)
    • [Q]uit – quits back to the calling program

    OTHER

    At any time, control-S will pause the output, any key to resume. Control-C from local mode will stop the program (and not save the data file), dunno about remote. (Only works during printing or waiting for input, I think. it’s part of the C compiler…)

    Oh yeah. Only way to remove a user from the data file is to use a text editor. So if you need space, and you’ve had a lot of users who won’t be back, you can delete them. Remember it’s two lines per user (the name, and the flag line). Also ENSURE that the end-of-file marker (‘@’) remains intact, or the program will likely lock up looking for it.

    I’ve included a sample VOTE.DAT file, you could simply use that, and delete my questions (replacing them with your own.)

    The source is included, for anyone who wants to play around with it (and I’m positive you will, FF. My prompts are somewhat… mundane.) I compiled it with the PCC compiler and linker.

    If there is any distribution, keep this doc and the source code with the program, eh? Thanks.

    VOTE 1.1 – April 1994

    The following things now work differently (they were marked with a ‘*’ in the above text, so you’d know!)

    There is a new mode, ‘A’. This mode will allow anyone to add a single vote topic. It works the same as adding from the sysop menu.

    Vote questions added by the program will now have an extra line which says “Contributed by: “. This means the minimum required lines to add a vote has been raised to 11. It also means the username passed in Sysop and Add modes is significant, because it is used when the question is added.

    The path has been completly changed. If used, it is now a COMPLETE filename of a voting file. This allows multiple “vote.dat” files, because you can call them anything now. Unless you provide a full path, they must be in the same directory as VOTE.EXE. The default, if nothing is given, is still VOTE.DAT. Must be prefixed by ‘-‘ to distinguish it from part of a multi-word user ID! (EX: vote n Captain C -vote2.dat)

    The old check for buffer overflow didn’t really work… although I never ran into that problem. It checked, it set the overflow flag, then it (seems it would have) saved the data file anyway. There is now a check in the save routine to not save if the data buffer has been overflowed. note that you cannot undo an overflow by deleting a question! The file has been corrupted in memory, and you must exit VOTE and start again before making further changes. Maybe VOTE should dump you out, or prevent the overflow? It’d be hard to fix a half-finished question, though.

    The [E]dit option has been removed from the sysop menu.

    User ID may now be more than one word. The filepath, if used, must be prefixed with ‘-‘ with no spaces. See above under path for an example.

    Visit original content creator repository
    https://github.com/tursilion/vote

  • freqtrade

    freqtrade

    Freqtrade CI DOI Coverage Status Documentation Maintainability

    Freqtrade is a free and open source crypto trading bot written in Python. It is designed to support all major exchanges and be controlled via Telegram or webUI. It contains backtesting, plotting and money management tools as well as strategy optimization by machine learning.

    freqtrade

    Disclaimer

    This software is for educational purposes only. Do not risk money which you are afraid to lose. USE THE SOFTWARE AT YOUR OWN RISK. THE AUTHORS AND ALL AFFILIATES ASSUME NO RESPONSIBILITY FOR YOUR TRADING RESULTS.

    Always start by running a trading bot in Dry-run and do not engage money before you understand how it works and what profit/loss you should expect.

    We strongly recommend you to have coding and Python knowledge. Do not hesitate to read the source code and understand the mechanism of this bot.

    Supported Exchange marketplaces

    Please read the exchange specific notes to learn about eventual, special configurations needed for each exchange.

    Supported Futures Exchanges (experimental)

    Please make sure to read the exchange specific notes, as well as the trading with leverage documentation before diving in.

    Community tested

    Exchanges confirmed working by the community:

    Documentation

    We invite you to read the bot documentation to ensure you understand how the bot is working.

    Please find the complete documentation on the freqtrade website.

    Features

    • Based on Python 3.9+: For botting on any operating system – Windows, macOS and Linux.
    • Persistence: Persistence is achieved through sqlite.
    • Dry-run: Run the bot without paying money.
    • Backtesting: Run a simulation of your buy/sell strategy.
    • Strategy Optimization by machine learning: Use machine learning to optimize your buy/sell strategy parameters with real exchange data.
    • Adaptive prediction modeling: Build a smart strategy with FreqAI that self-trains to the market via adaptive machine learning methods. Learn more
    • Edge position sizing Calculate your win rate, risk reward ratio, the best stoploss and adjust your position size before taking a position for each specific market. Learn more.
    • Whitelist crypto-currencies: Select which crypto-currency you want to trade or use dynamic whitelists.
    • Blacklist crypto-currencies: Select which crypto-currency you want to avoid.
    • Builtin WebUI: Builtin web UI to manage your bot.
    • Manageable via Telegram: Manage the bot with Telegram.
    • Display profit/loss in fiat: Display your profit/loss in fiat currency.
    • Performance status report: Provide a performance status of your current trades.

    Quick start

    Please refer to the Docker Quickstart documentation on how to get started quickly.

    For further (native) installation methods, please refer to the Installation documentation page.

    Basic Usage

    Bot commands

    usage: freqtrade [-h] [-V]
                     {trade,create-userdir,new-config,new-strategy,download-data,convert-data,convert-trade-data,list-data,backtesting,edge,hyperopt,hyperopt-list,hyperopt-show,list-exchanges,list-hyperopts,list-markets,list-pairs,list-strategies,list-timeframes,show-trades,test-pairlist,install-ui,plot-dataframe,plot-profit,webserver}
                     ...
    
    Free, open source crypto trading bot
    
    positional arguments:
      {trade,create-userdir,new-config,new-strategy,download-data,convert-data,convert-trade-data,list-data,backtesting,edge,hyperopt,hyperopt-list,hyperopt-show,list-exchanges,list-hyperopts,list-markets,list-pairs,list-strategies,list-timeframes,show-trades,test-pairlist,install-ui,plot-dataframe,plot-profit,webserver}
        trade               Trade module.
        create-userdir      Create user-data directory.
        new-config          Create new config
        new-strategy        Create new strategy
        download-data       Download backtesting data.
        convert-data        Convert candle (OHLCV) data from one format to
                            another.
        convert-trade-data  Convert trade data from one format to another.
        list-data           List downloaded data.
        backtesting         Backtesting module.
        edge                Edge module.
        hyperopt            Hyperopt module.
        hyperopt-list       List Hyperopt results
        hyperopt-show       Show details of Hyperopt results
        list-exchanges      Print available exchanges.
        list-hyperopts      Print available hyperopt classes.
        list-markets        Print markets on exchange.
        list-pairs          Print pairs on exchange.
        list-strategies     Print available strategies.
        list-timeframes     Print available timeframes for the exchange.
        show-trades         Show trades.
        test-pairlist       Test your pairlist configuration.
        install-ui          Install FreqUI
        plot-dataframe      Plot candles with indicators.
        plot-profit         Generate plot showing profits.
        webserver           Webserver module.
    
    optional arguments:
      -h, --help            show this help message and exit
      -V, --version         show program's version number and exit


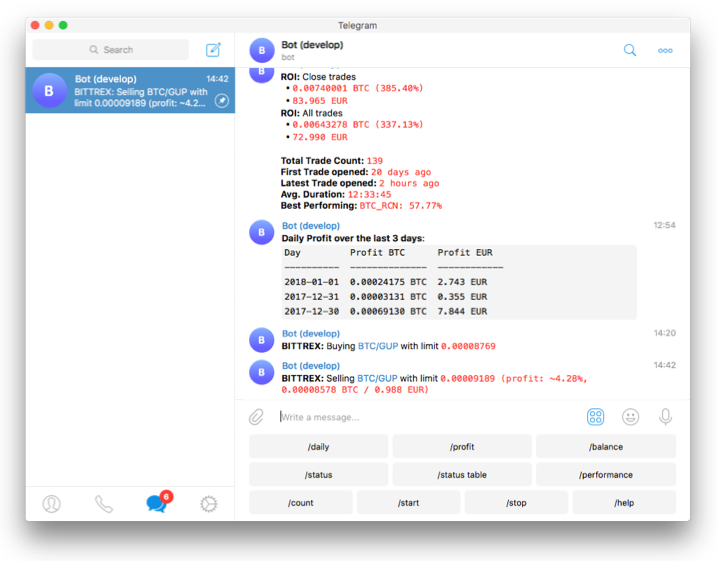
    Telegram RPC commands

    Telegram is not mandatory. However, this is a great way to control your bot. More details and the full command list on the documentation

    • /start: Starts the trader.
    • /stop: Stops the trader.
    • /stopentry: Stop entering new trades.
    • /status <trade_id>|[table]: Lists all or specific open trades.
    • /profit [<n>]: Lists cumulative profit from all finished trades, over the last n days.
    • /forceexit <trade_id>|all: Instantly exits the given trade (Ignoring minimum_roi).
    • /fx <trade_id>|all: Alias to /forceexit
    • /performance: Show performance of each finished trade grouped by pair
    • /balance: Show account balance per currency.
    • /daily <n>: Shows profit or loss per day, over the last n days.
    • /help: Show help message.
    • /version: Show version.

    Development branches

    The project is currently setup in two main branches:

    • develop – This branch has often new features, but might also contain breaking changes. We try hard to keep this branch as stable as possible.
    • stable – This branch contains the latest stable release. This branch is generally well tested.
    • feat/* – These are feature branches, which are being worked on heavily. Please don’t use these unless you want to test a specific feature.

    Support

    Help / Discord

    For any questions not covered by the documentation or for further information about the bot, or to simply engage with like-minded individuals, we encourage you to join the Freqtrade discord server.

    If you discover a bug in the bot, please search the issue tracker first. If it hasn’t been reported, please create a new issue and ensure you follow the template guide so that the team can assist you as quickly as possible.

    For every issue created, kindly follow up and mark satisfaction or reminder to close issue when equilibrium ground is reached.

    –Maintain github’s community policy

    Have you a great idea to improve the bot you want to share? Please, first search if this feature was not already discussed. If it hasn’t been requested, please create a new request and ensure you follow the template guide so that it does not get lost in the bug reports.

    Feel like the bot is missing a feature? We welcome your pull requests!

    Please read the Contributing document to understand the requirements before sending your pull-requests.

    Coding is not a necessity to contribute – maybe start with improving the documentation? Issues labeled good first issue can be good first contributions, and will help get you familiar with the codebase.

    Note before starting any major new feature work, please open an issue describing what you are planning to do or talk to us on discord (please use the #dev channel for this). This will ensure that interested parties can give valuable feedback on the feature, and let others know that you are working on it.

    Important: Always create your PR against the develop branch, not stable.

    Requirements

    Up-to-date clock

    The clock must be accurate, synchronized to a NTP server very frequently to avoid problems with communication to the exchanges.

    Minimum hardware required

    To run this bot we recommend you a cloud instance with a minimum of:

    • Minimal (advised) system requirements: 2GB RAM, 1GB disk space, 2vCPU

    Software requirements

    Visit original content creator repository https://github.com/freqtrade23/freqtrade