A neural network written in Python to solve XOR problem.
Architecture
The dimensions of this neural network can be changed dynamically. For XOR problem it is sufficient to have 2 neurons in the input layer, 10 neurons in the hidden layer, and 2 neurons in the output layer (classes ‘0’ and ‘1’). Dimensions are adjusted by this line of code:
# two input neurons, one hidden layer with 10 neurons, last layer with 2 output neurons
NN_dimensions = [2, 10, 2]

# a - number of inputs, Ln - number of neurons in hidden layers
NN_dimensions = [a, L1, L2, ..., Ln]
In this code example, the number of iterations is fixed, and the learning rate is fixed as well. This project was made with one purpose: delving into the essence of neural networks, that is, math.
Notations used in formulas for gradient calculation:
Weight notation, where (n) – layer index, i – neuron index, j – weight index:
$$W_{ij}^{(n)}$$
Bias value, where (n) – layer index, i – neuron index:
$$b_{i}^{(n)}$$
The weighted sum value z of a neuron, where (n) – layer index, i – neuron index:
$$z_{i}^{(n)}$$
The activation value a of a neuron, where (n) – layer index, i – neuron index:
$$a_{i}^{(n)}$$
The predicted output for class i, where i is the index of neuron in the last (output) layer:
$$\hat{y_i} = a_i^{(lastLayer)}$$
The expected output for class i, where i is the index of neuron in the last (output) layer:
$$y_i$$
The cost function of the whole neural network:
$$C$$
Calculations
The learning process is, in simple words, many repetitions of “moving” forward and calculating activation values, then going backward and adjusting weights and biases based on that. For the forward propagation, we use functions of weighted sum, activation and square error. For backpropagation we have to find derivatives of square error with respect to activation, then derivative of activation with respect to weighted sum, and lastly derivative of weighted sum with respect to weight.
Sum, activation, and cost functions for forward propagation
As mentioned before, it is necessary to calculate the sum values z for every neuron in every hidden layer.
We use the formula as follows (M – number of neurons in the previous layer):
The activation function of every neuron in this neural network is sigmoid.
It is calculated as follows:
$$a_i^{(n)} = \frac{1}{1 + e^{(-z_i^{(n)})}}$$
The cost function used here is slightly different from MSE (Mean Square Error). Instead of taking the mean of all square errors, we take 1/2. This is done in order for the derivative to be a bit simpler.
MSE (or C) is calculated as follows:
Graphical visualization of applying the chain rule in the output layer
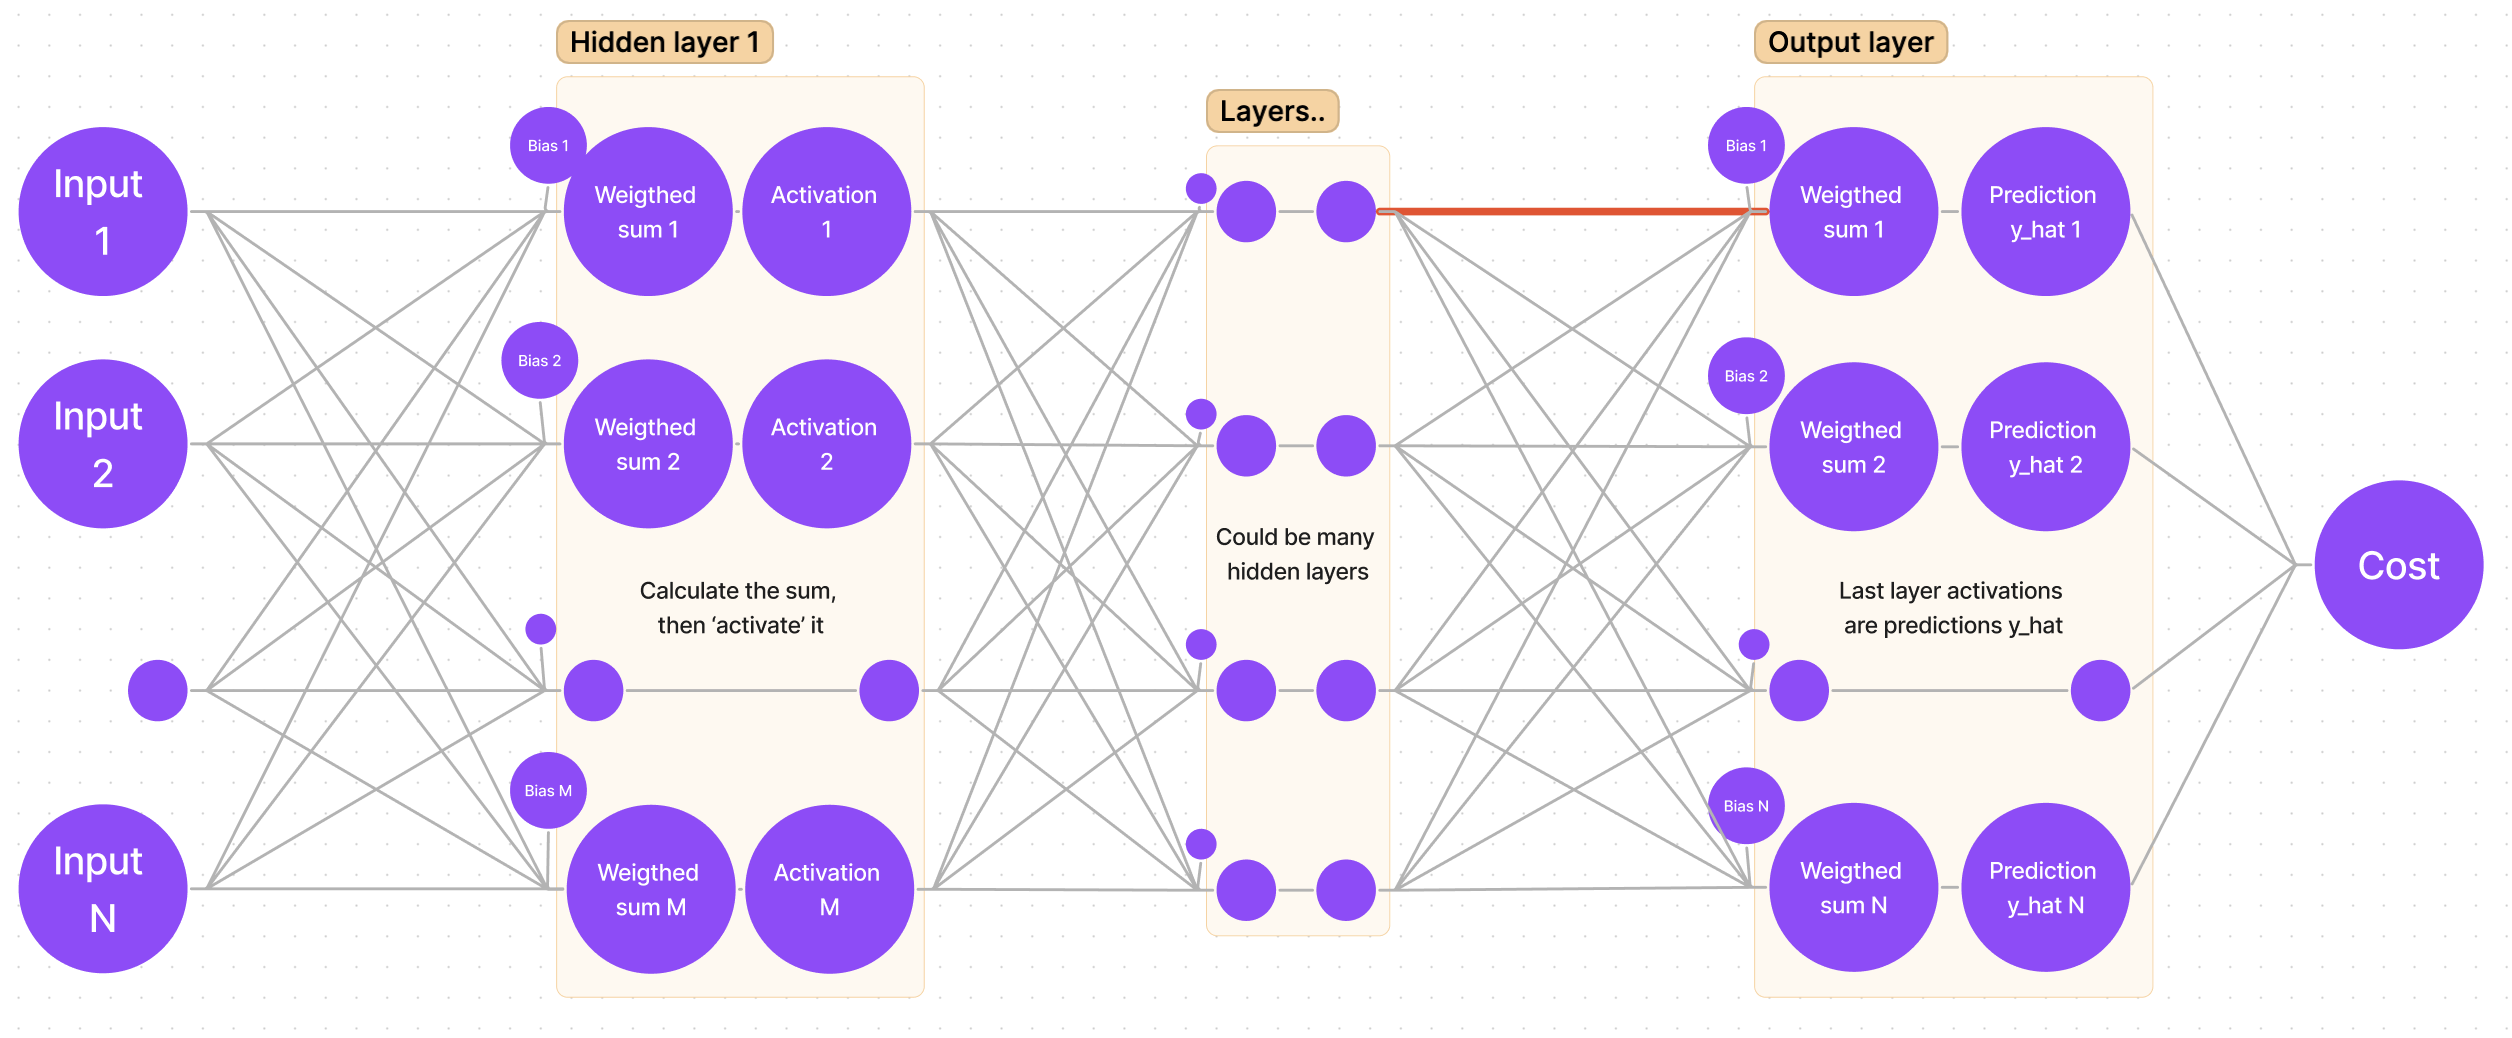
In order to calculate the gradient for each weight we have to calculate the partial derivative of cost with respect to that weight. I find it easier to think of this process as “finding the path that leads from cost to that weight“.
If we sketch our neural network, we get a generalized graph:
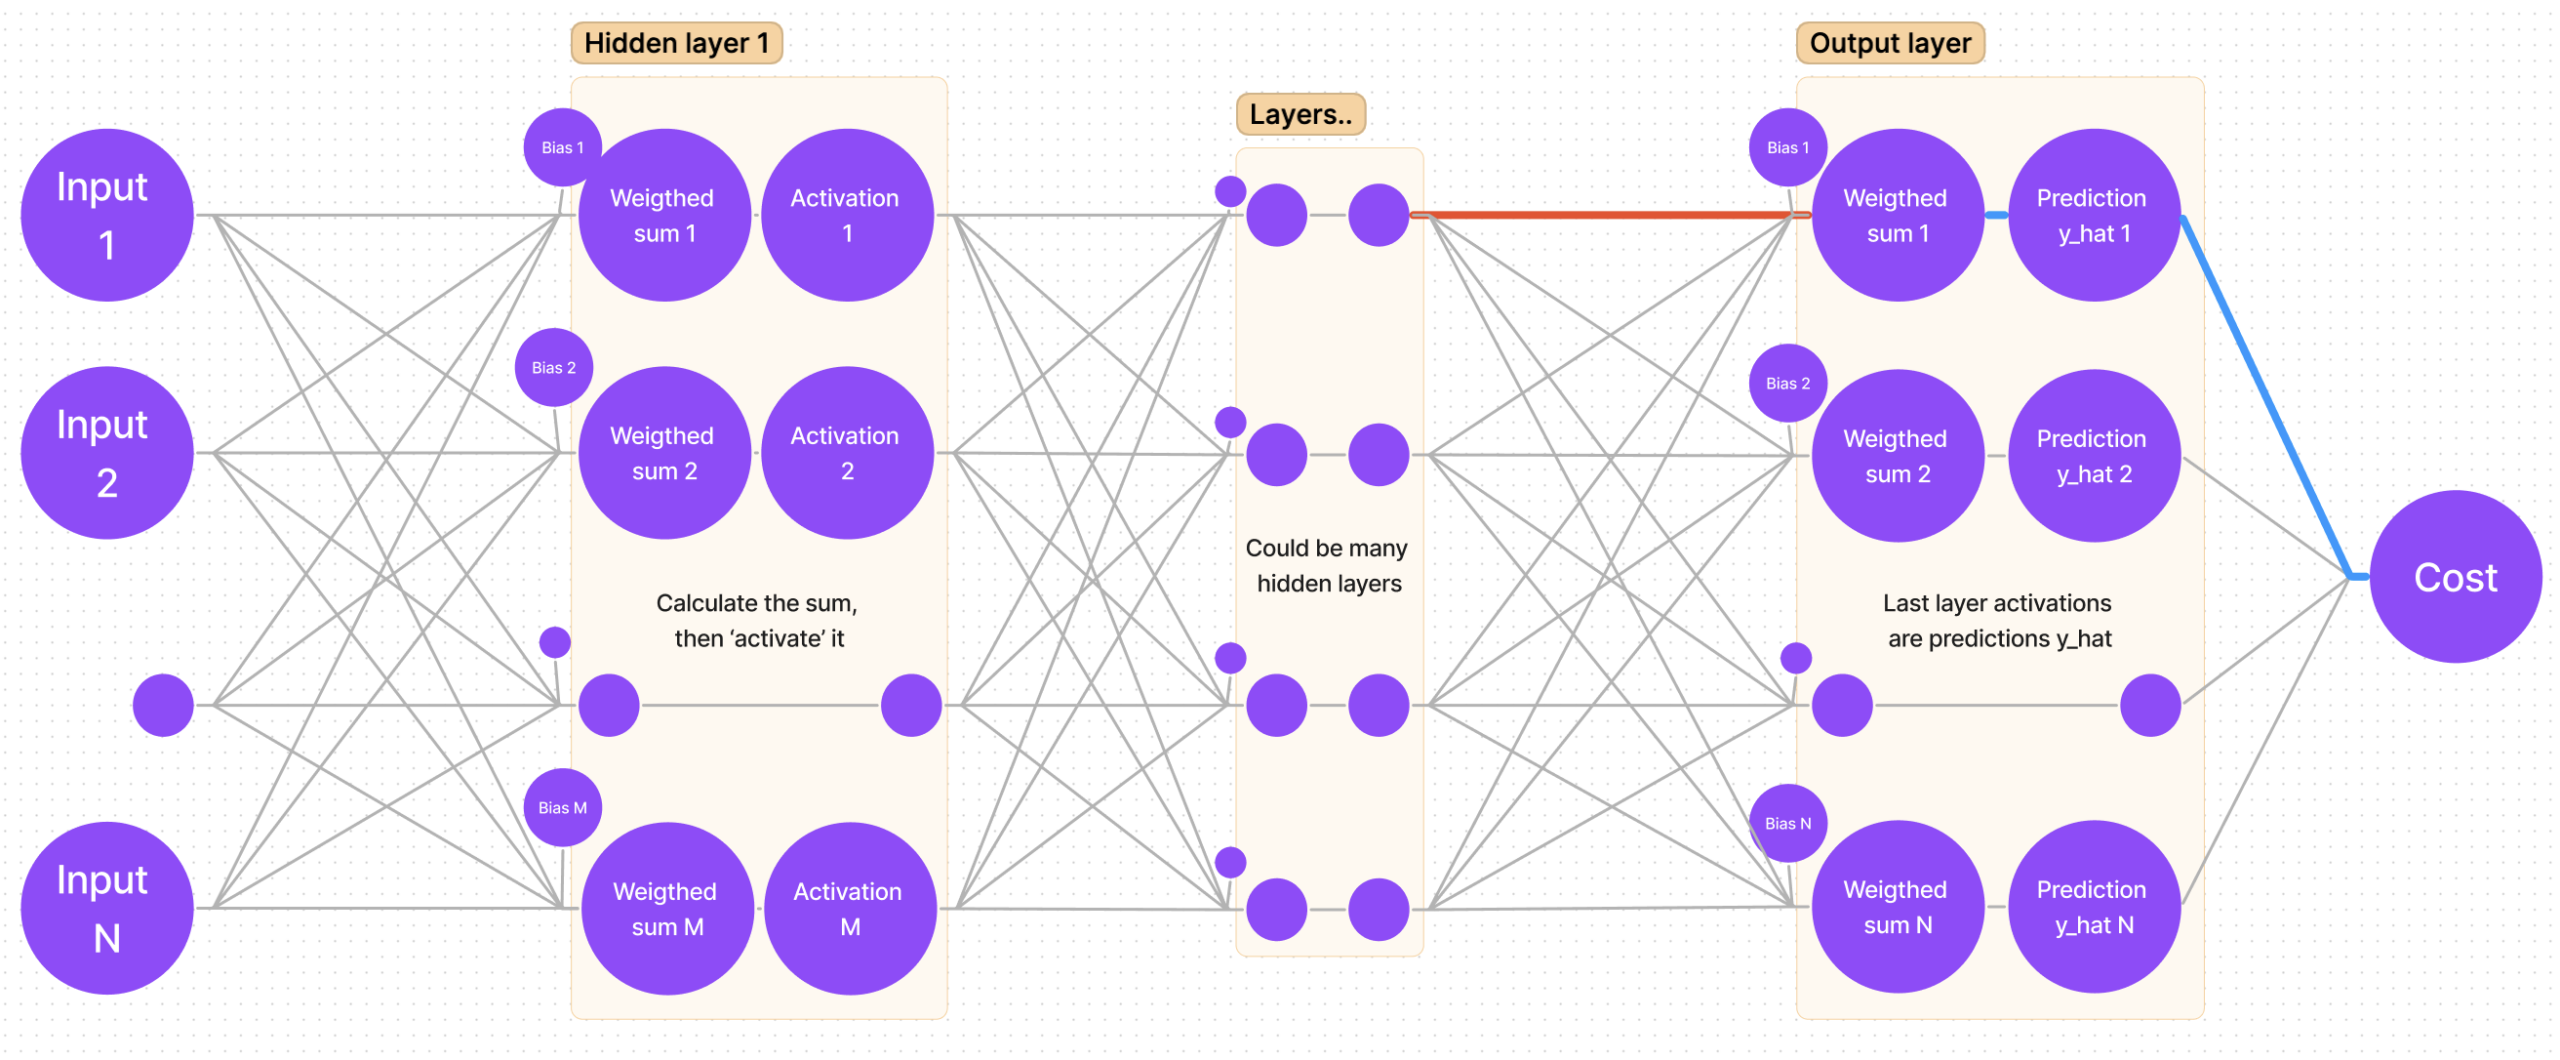
First things first, we want to adjust the weights for the output (last) layer (remember, we are starting from “the end”). It means that we are looking for:
Suppose we are looking for the gradient for the first weight of the first neuron. In the sketch, that weight is marked with a bold red line:
I myself use an intuitive way for finding the derivative: follow the path from the cost function to that weight you are looking for (bold blue lines):
It is clear that we have to “traverse” through cost-y_hat, then y_hat-sum, and lastly sum-weight. That’s the same as saying: find the partial derivative of cost with respect to y_hat, then find the partial derivative of y_hat with respect to sum, and finally the partial derivative of sum with respect to weight.
Mathematical approach and applying the chain rule for the output layer
So, if we are calculating gradients for the last layer n, by following the chain rule, we get the following equation:
That’s it! Having found the gradient for each weight in the output layer, we can use it to adjust the weights:
$$W_{ij}^{(n)} := W_{ij}^{(n)} – grad * learningRate$$
Graphical visualization of the chain rule for hidden layers
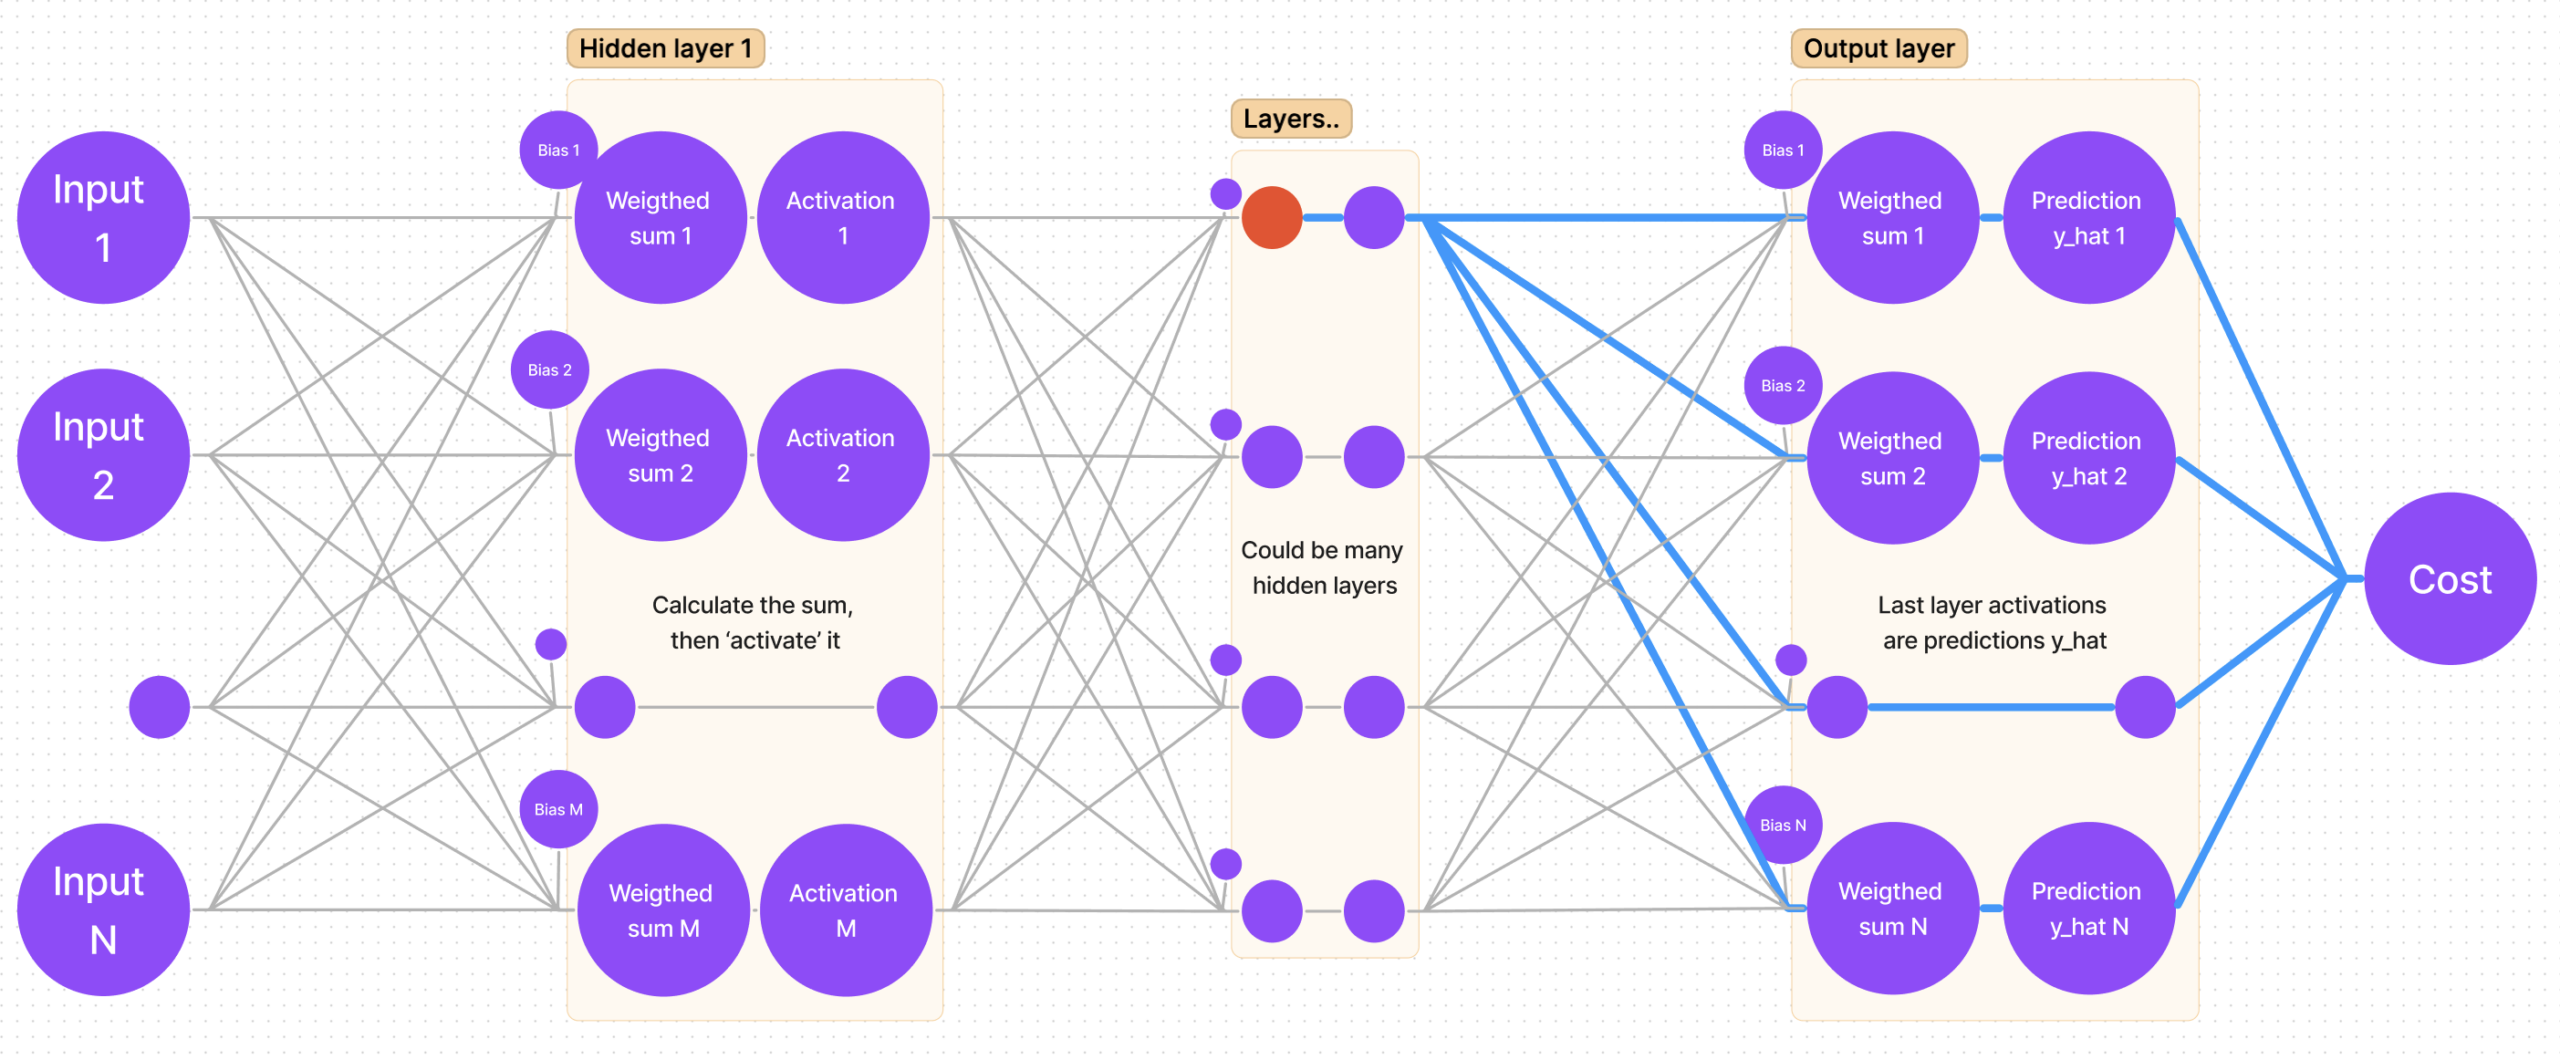
Now the harder part is calculating the gradient for hidden layers. Luckily, there is a pattern for calculating the derivatives, as some of them repeat themselves in different layers’ equations. To acknowledge that pattern, we must not calculate the derivative of cost with respect to weight, but find the partial derivative of cost with respect to sum (this way we will be able to save that derivative value and use it later).
Let’s once again mark the sum of a hidden layer with the color red:
Now let’s find all paths from cost to that sum:
It is clear that there’s more than one path, but that’s quite easy to account for – the calculation is done by adding all partial derivatives that we get “traversing each path”!
Mathematical approach and applying chain rule for hidden layers
There’s one unresolved question: why take the derivatives of cost with respect to sum and not with respect to weight? As we will soon find out, there is a pattern: derivatives repeat themselves, hence calculating and saving derivatives as we move from the outer layer (BACK propagation) to ‘front’ enables us to reuse the values (note: remember what I said about “traversing all paths” and adding them up? That’s where the summation sign comes from; M – number of neurons in the next (n+1) layer):
Note how the last derivative is constant in terms of k (that value is the same for every member in the summation), so we can put it before the summation sign. Also note, that we have two partial derivatives that can be rewritten as one:
Notice how for the cost derivative with respect to sum in layer n we have to use the cost derivative with respect to sum in layer (n+1). That’s the most important part of making the code work – saving the derivatives.
Gradient descent, general expressions, and round-up
Now we know everything we need to know to use the gradient descent algorithm. Let’s sum up really quickly and get to coding!
General expressions for finding derivatives
As the most important part of the program is saving partial derivatives of cost with respect to each layer’s sum, let’s write it in a nice and concise way.
Once we have calculated all derivatives, we can adjust the weights by calculating the full gradient and subtracting it from that weight. Here we have two general formulas. First one for adjusting any weight:
Making sure your tailor-made error solution is seamless!
The Error Tailor offers seamless handling of form errors, saving you the trouble of repeating the error boilerplate.
It’s fully customizable, so you can control when, where, and how each form field’s errors are displayed.
Sit back, relax, and let the Error Tailor do all the work!
Getting Started
Run npm install @ngneat/error-tailor and add the imports to your application:
import{provideErrorTailorConfig}from'@ngneat/error-tailor';bootstrapApplication(AppComponent,{providers: [provideErrorTailorConfig({errors: {useValue: {required: 'This field is required',minlength: ({ requiredLength, actualLength })=>`Expect ${requiredLength} but got ${actualLength}`,invalidAddress: error=>`Address isn't valid`}}})]})
The errors config property takes a partial Provider, that should provide a HashMap<string | (err:any) => string> that is an object with keys corresponding to the errors name that you want to handle, and values that can be a simple string, or function that return a string used as error message to be shown.
This function runs inside the directive injector context.
Now the only thing you need to add is the errorTailor directive to your form:
<form[formGroup]="form" errorTailor><divclass="form-group"><inputclass="form-control" formControlName="name" placeholder="Name" /></div><sectionformGroupName="address"><divclass="form-group"><inputclass="form-control" formControlName="city" placeholder="City" /></div><divclass="form-group"><inputclass="form-control" formControlName="country" placeholder="Country" /></div></section><divclass="form-group"><selectformControlName="animal" class="form-control"><option*ngFor="let option of options; index as index" [ngValue]="option">
{{ option.label }}
</option></select></div><buttonclass="btn btn-success">Submit</button></form>
The directive will show all errors for a form field automatically in two instances – on the field element blur and on form submit.
Inputs
controlErrorsClass – A custom classes that’ll be added to the control error component and override custom classes from global config, a component that is added after the form field when an error needs to be displayed:
controlErrorAnchor – A custom anchor element for the control error component. The default anchor is the form field element:
<divclass="form-check form-group"><inputtype="checkbox" formControlName="terms" id="check" [controlErrorAnchor]="anchor" /><labelclass="form-check-label" for="check">
I agree to the terms and conditions
</label><ng-templatecontrolErrorAnchor#anchor="controlErrorAnchor"></ng-template></div>
The custom anchor can also be added as a directive, in which case it’ll act as the anchor for any nested form fields:
<divclass="form-check form-group" controlErrorAnchor><inputtype="checkbox" formControlName="terms" id="check" /><labelclass="form-check-label" for="check">
I agree to the terms and conditions
</label></div>
controlErrors – Additional errors to use for the form field, that aren’t specified in the config:
controlErrorsIgnore – A custom attribute on a form field element to skip instantiating of a control error component on it.
One typical case when to use it is radio buttons in the same radio group where it’s enough to show only one error message and not all of them for each separate radio button.
showError() – Programmatic access to show a control error component (without a blur or a submit event). A validation error should still exist on that element. The key is the published exportAs reference of errorTailor to a directive instance of ControlErrorsDirective and calling its public method showError().
Syntax as @ViewChild('gdprErrorTailor', { static: true }) gdprErrorTailor: ControlErrorsDirective; is used to get the reference and later call this.gdprErrorTailor.showError().
hideError() – Programmatic access to hide an already shown control error component with the same logic as showError(), so for example: this.gdprErrorTailor.hideError().
controlClassOnly – Optional. If true, the error component won’t be created and only the error class will be added to the control. Default is false.
controlErrorsClass – Optional. A custom classes that’ll be added to the control error component. Can be override if you set attribute controlErrorsClass on control
controlCustomClass – Optional. A custom classes that’ll be added to the control if control has error. Can be override if you set attribute controlCustomClass on control
controlErrorComponent – Optional. Allows changing the default component that is used to render
the errors. This component should implement the ControlErrorComponent interface. If you only need to
replace the error component’s template, you may derive it from the default component,
DefaultControlErrorComponent, and provide the requisite HTML template.
A common example is when using Ionic forms where each form field is wrapped in an ion-item and errors
are best displayed as a sibling ion-item of the field. Example below shows how this can be done using
a custom control error component.
For example:
// Custom error component that will replace the standard DefaultControlErrorComponent.
@Component({standalone: true,imports: [errorTailorImports],template: ` <ion-item lines="none" class="ion-text-wrap" [class.hide-control]="hideError"> <ion-label color="danger" class="ion-no-margin ion-text-wrap" stacked> {{ errorText }} </ion-label> </ion-item> `})exportclassIonicControlErrorComponentextendsDefaultControlErrorComponent{}bootstrapApplication(AppComponent,{providers: [provideErrorTailorConfig({errors: {useValue: {required: 'This field is required'}},controlErrorComponent: IonicControlErrorComponent})]})
controlErrorComponentAnchorFn – Optional. A hook function that allows the error component’s
HTML element to be repositioned in the DOM. By default error components are inserted at the
bottom of the field with error. If your UI layout dictates a different positioning
scheme, you may use this hook.
Since this error element can be placed anywhere in the DOM, it also has to be
removed when the error component is destroyed. To provide for this, this
function should return a callback that will then be invoked when the error component
is destroyed. You may use this to remove the error HTML element that you inserted
into the DOM yourself.
Example below shows how the Ionic specific error component is repositioned in the DOM
to suit Ionic’s form layout. hostElem is the HTML element for the form control and
errorElem is the HTML element for the error component.
anchorIonicErrorComponent(hostElement: Element,errorElement: Element){hostElement.parentElement.insertAdjacentElement('afterend',errorElement);return()=>{leterrorNode=hostElement.parentElement.querySelector('custom-control-error');if(errorNode){errorNode.remove();}};}bootstrapApplication(AppComponent,{providers: [provideErrorTailorConfig({errors: {useValue: {required: 'This field is required'}},controlErrorComponent: IonicControlErrorComponent,controlErrorComponentAnchorFn: anchorIonicErrorComponent})]})
controlErrorsOn – Optional. An object that allows the default behavior for showing the errors to be overridden. (each individual property in the object is optional, so it’s possible to override only 1 setting)
PageController is infinite paging controller, scrolling through contents and title bar scrolls with a delay. Then it provide user interaction to smoothly and effortlessly moving. It is for iOS written in Swift.
publicprotocolMenuBarCellable{
// it's used by PageController
varindex:Int{getset}
// it is used to set to Label.text, caused by deprecating MenuCell over 0.7
func setTitle(_ title:String)
// it's instead of `updateData` over 0.7,
func setHighlighted(_ highlighted:Bool)
// Called by the menu bar on creating the instance.
func prepareForUse()}
License
PageController is available under the MIT license.
From 1.0.0 new networking driver based on kurento media server.
From 0.7.0 Migrate to webpack5 version
[If you have some trouble try to deleting node_modules/ and install again]
2d canvas game engine based on Matter.js 2D physics engine for the web supported with kurento/OVServer and visual GUI tool 2d map creator/python3.
I use my own concept: take lib only for the great benefits. It means that i import only stuff that i can’t make in proper way in proper time, all other coming from head. For example Physics was imported in role of npm package for typescript matter.js/ts variant and i keep dependency healthy.
In networking aspect i use full-duplex connection under web-rtc protocol. Pretty nice working combination of physics and realtime-multiplayer connetions. HTMLRequest used only for loading html parts in run time (on request) and accounts{wip} because i want clear single page application with all PWA features inside. Also video chat is integrated based on OV server/kurento.
You can start recording canvas gameplay with implemented record-canvas.
Lib is not to much inself closed. Every intervention or used
feature is exposed in high level in that way you can make very fast
implementation of your own logic what ever will be.
You are not forced to use typescript you can always downgrade to javascript this comes
with typescript inself.
Example multiplayer
Migrated to webpack5
Simple there is nothing between you and making the app.
Written in typescript current version 4.2.4.
Package tool used webpack 5.5.0.
Text editor used and recommended: Last version of Visual Studio Code [1.95.x].
Luanch debugger configuration comes with this project (for server part).
Or run server on Javascript Debug Terminal.
Physics engine based on Matter.js - Matter.ts (npm project).
Mobile controls / Tested on android
Based on touch area bounds LEFT , UP, RIGHT (for platformer based gameplay, for now).
Logo
Landscape logo
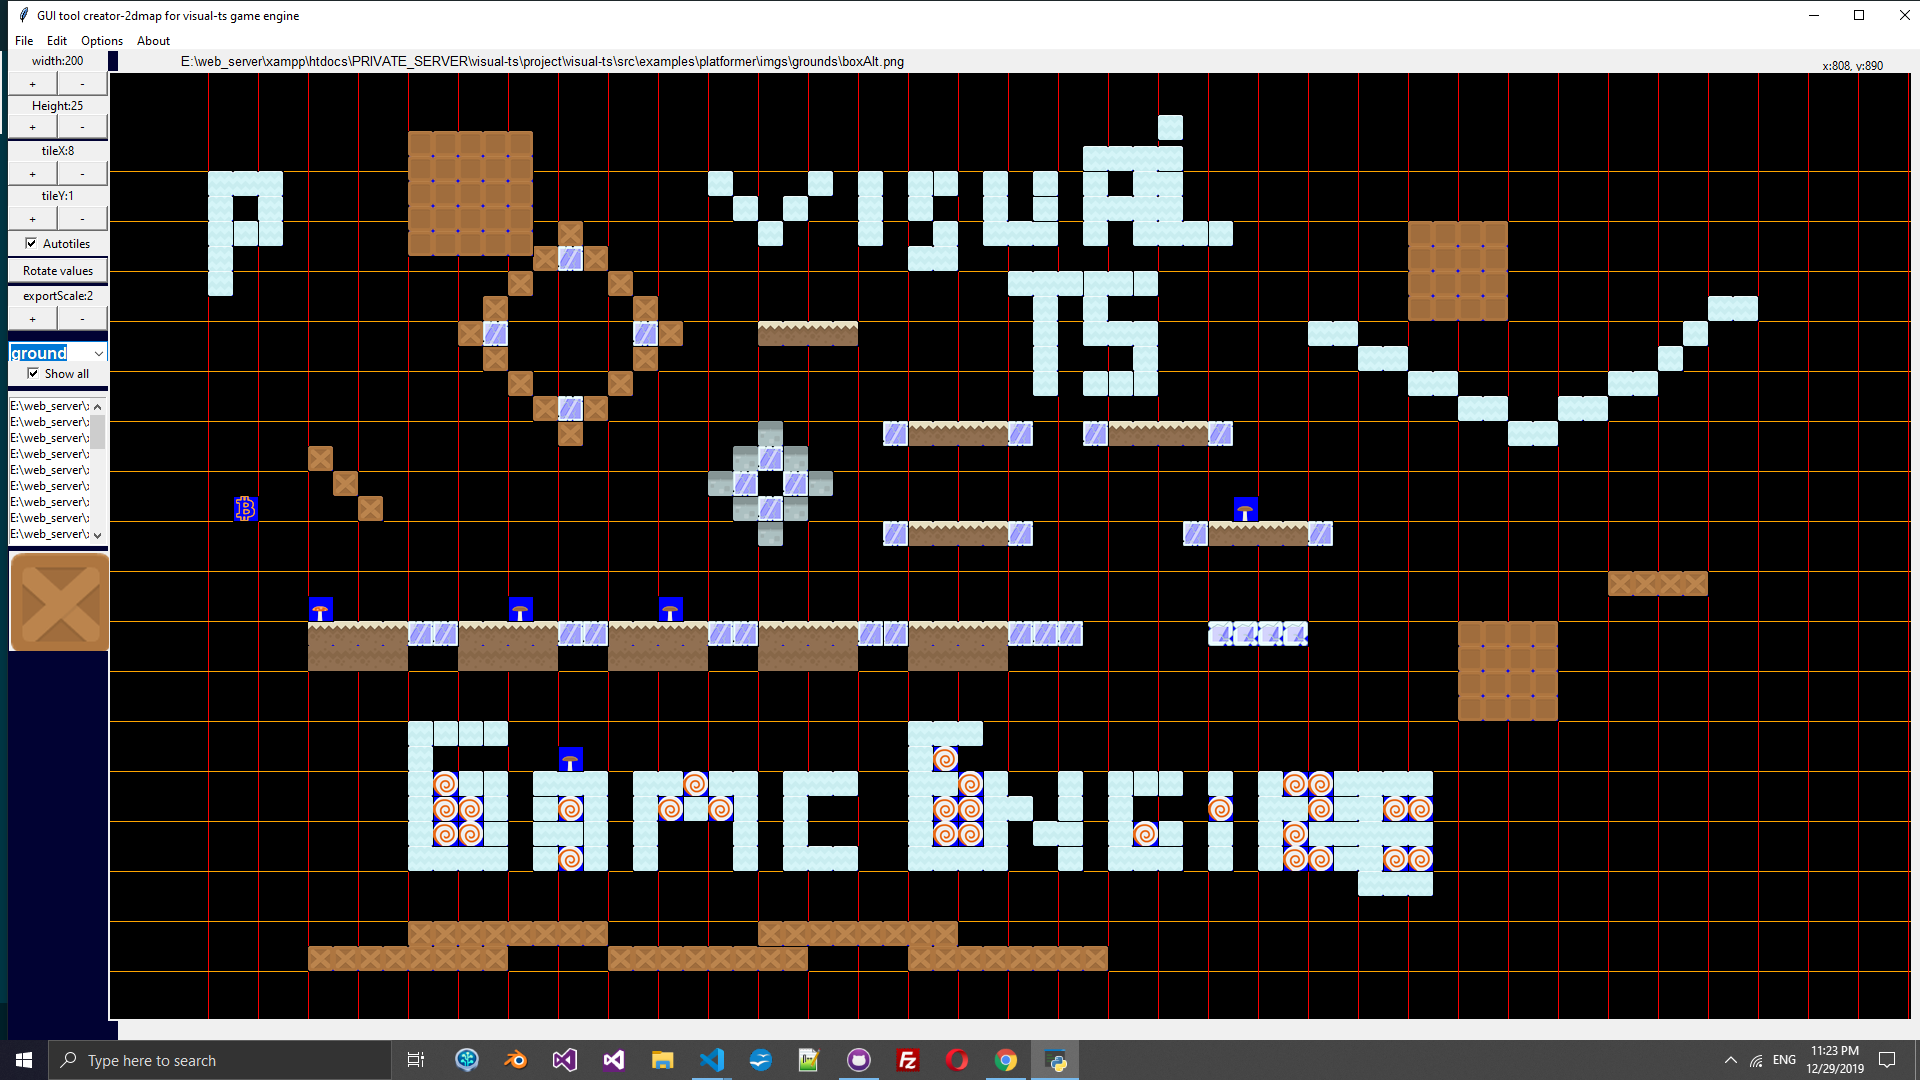
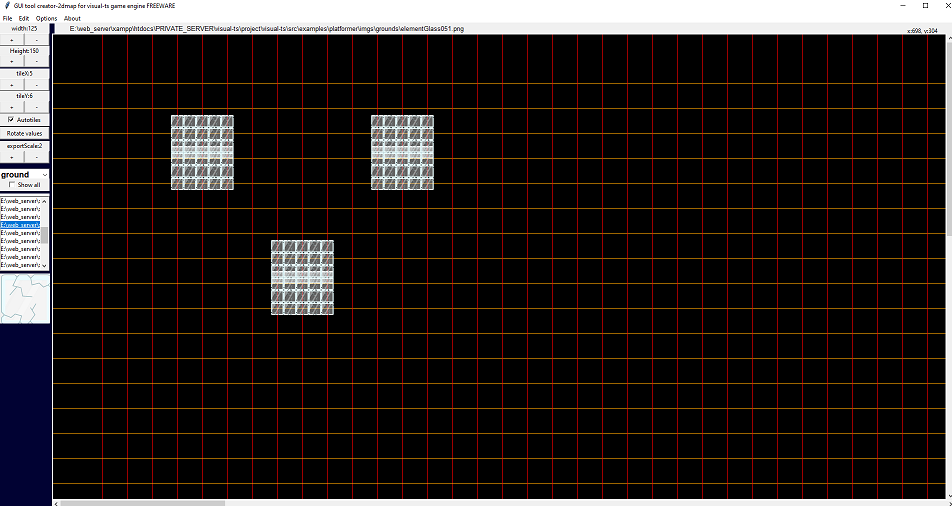
VisualTsGameEngine GUI tool 2d Map Creator made in python:
Much more easyest way to make yor gameplay table sets is creator-2dmap python script. After installation of all needed modules vie pip3 for python3, you need to run:
@Note If you use
git clone --recurse-submodules https://github.com/zlatnaspirala/visual-ts-game-engine
Possible bug on oldies linux os mint. Bug related with tkinter lib.
You need to change self.absolutePacksPath from defaults.py config file.
Put example platformer pack folder path: src\examples\platformer\scripts\packs but path must be absolute, my personal path is (For windows users : use double \ for escape ):
This is freeware / opensource. There is no any limitation in this project.
You can use video stream as gamePlay objects , multiplayer feature is also free.
Please don’t use fake email address to test public maximumroulette.com platformer example.
Project even in dev stage is totally production approach. You can’t pass registration with fake email.
Just clone, install and run in local (client & server). You need to install and run also MongoDB on
your system. Change flag in databased confimed to the true value to skip registration confirmation process.
Client part
To make all dependency works in build proccess we need some plugins.
Navigate in browser /build/app.html to see client app in action
New way of building multi entries.
Command is npm run dev-all . This is test for multi instancing webpack capabilities.
Webpack in this case use webpack.multicompile.config.js.
Thanks for common object definition:
This is best place to manage status of your build action.
Just comment or uncomment specific webpack object in this place =>
webpack.multicompile.config.js
module.exports=[webPackModuleMultiPlayerSolution,webPackModuleSingleSimpleSolution,webPackModuleMultiChatBasketBall,webPackModuleTutorialsDemo1,// webPackModuleTutorialsDemo2 DISABLE HERE WHOLE SUB BUILD];
Point of Multi entries is to make independent healthy builds end point
for our application. Current export’s for 3 solutions looks like
(runs webpack.multicompile.config.js) :
-Client part is browser web application. No reloading or redirecting. This is single page
application. I use html request only for loading local/staged html (like register, login etc.).
Networking is based on webSocket full-duplex communication only. This is good cross for old
fasion native programmers not for web server REST oriented skills. No mix in communication usage.
You must be conform with classic socket connection methodology and your own idea about connections.
webRTC can be used for many proporsion.
Already implemented:
video chat webRTC (SIP) chat and data communication.
based on multiRTC3 for all modern browser’s and hybryd implementation
(android, ios etc.) (UDP/TCP). Running on socket.
Bonus connections options – Coordinator another brodcaster.
Parallel multiRTC connections. Coordinator is disabled by default
but can be used in same way just like broadcaster.
Simple facebook api script (addson).
-Class ‘Connector’ (native webSocket) used for user session staff.
For main account session staff like login, register etc.
Client config
If you want web app without any networking then setup:
appUseNetwork: boolean = false;
You want to use communication for multiplayer but you don’t want to use server database
account sessions. The setup this on false in main client config class.
appUseAccountsSystem: boolean = false;
Networking is disabled or enabled depens on current dev status.
Find configuration for client part at ./src/lib/client-config.ts
First game template is Platformer.
This is high level programming in this software. Class Platformer run
with . Class Starter is base class for my canvas part
(matter.js/ts).
It is injected to the Platformer to make full operated work.
gamesList args for ioc constructor is for now just simbolic for now. (WIP)
In ioc you can make strong class dependency relations.
Use it for your own structural changes. If you want to make light version for build
than use ioc to remove everything you don’t need in build.
ioc.ts files located at: src\controllers. In ioc file i import choosen classes and
create instance or bind. Ioc also save (singleton) instance’s and we never make same
class instance again (this is the role). We just call game.ioc.get.NAME_OF_INSTANCE.
Object .get is key access object not array.
Best practice is to use only one ioc. In that way you will get clear build without
big shared in most time unnecessary data. If you application is big project.Than
best way is still use one ioc.ts for per web page. In that way i use refresh
or redirect moment to load optimised script bundle for current page.
Main dependency file
Current version:
/** * Import global css */require("./style/animations.css");require("./style/styles.css");importAppIconfrom"./app-icon";importGamePlayfrom"./examples/platformer/scripts/game-play";importIocfrom"./controllers/ioc";/** * plarformerGameInfo * This is strong connection. * html-components are on the same level with app.ts * Put any parameters here. */constplarformerGameInfo={name: "Platformer",title: "Start Platformer game play",};constgamesList: any[]=[plarformerGameInfo];constmaster=newIoc(gamesList);constappIcon: AppIcon=newAppIcon(master.get.Browser);master.singlton(GamePlay,master.get.Starter);console.log("Platformer: ",master.get.GamePlay);master.get.GamePlay.attachAppEvents();/** * Make it global for fast access in console testing. * (window as any).platformer = master.get.GamePlay; */(windowasany).master=master;(windowasany).platformer=master.get.GamePlay;
Recording your game
Setup in client-config.ts:
public recordCanvasOption: any={injectCanvas: ()=>document.getElementsByTagName("canvas")[0],frameRequestRate: 30,videoDuration: 20,outputFilename: "record-gameplay.mp4",mineType: "video/mp4",resolutions: '800x600'}
Disabled at the moment for single-player solution.
javascript
private autoStartGamePlay: boolean = false;
If you setup ‘autoStartGamePlay’ to false you need to run gamePlay
with :
javascript
master.get.GamePlay.load()
Note : Only singleton object instance from master start with upcase letters.
Project structure
build/ is autogenerated. Don’t edit or add content in this folder.
src/ is main client part (Browser web application).
Main file : app.ts
src/libs/ is common and smart pack of classes, interfaces etc.
easy access.
server/ folder is fully indipendent server size. I use one git repo
but consider ‘/server’ represent standalone application. There’s server
package.json independently from client part also config is not the common.
I just like it like that.
Explanation for:
this.serverMode = “mongodb.net-dev”;
If you wanna use mongod.net database but you wanna use it from localhost.
Multiplayer (with videochat or realtime net) still use https.
For single player variant you can use http.
Audios
Audios are not loaded by defoult if you use it in IOC controller.
You create audio instance from code.
You can mute it all.
Add new sound
Open webpack and add line:
[After this you need to restart webpack.]
new CopyWebpackPlugin([
  ...
  // Audios
  {from: "./src/examples/platformer-single-player/audios/player/dead.mp3", to: "audios/newAudio1.mp3"}
  {from: "./src/examples/platformer-single-player/audios/player/dead.mp3", to: "audios/newAudio2.mp3"}
], { debug: 'warn' })
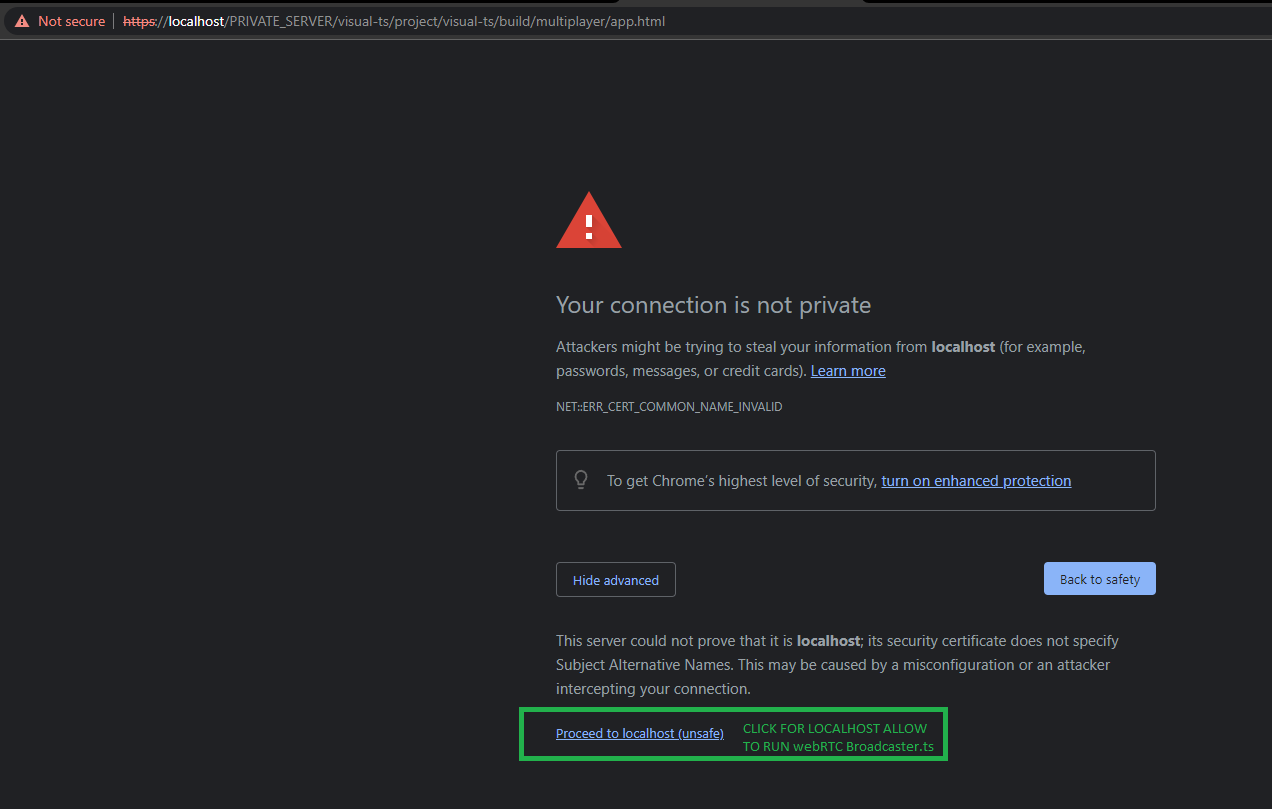
Read more about cert
serverMode dev od prod use https protocol to make full works on both regime (If you using multiplayer example).
You need to install cert (mmc.exe) (for User or local Mashine), also in browser:
GUI Tools
To get GUI tools first download python3 for your OS.
creator2dmap is python3 canvas oriented application.
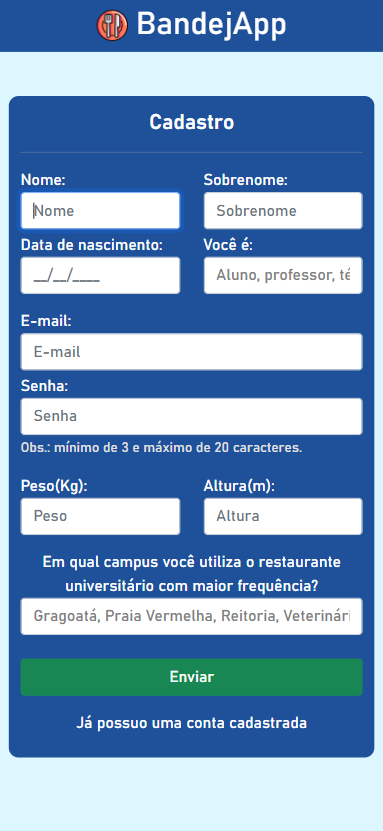
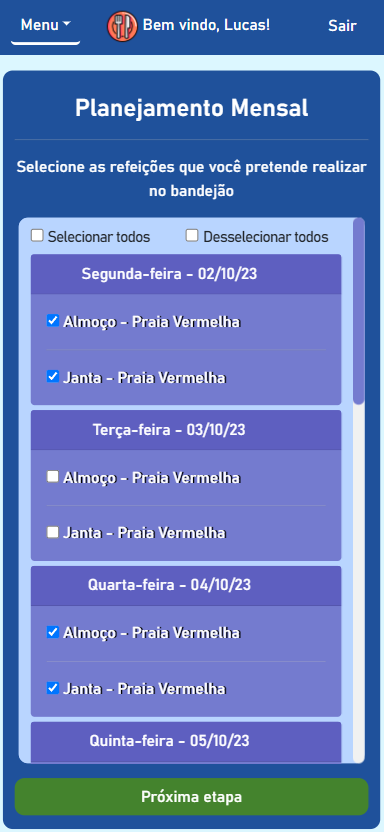
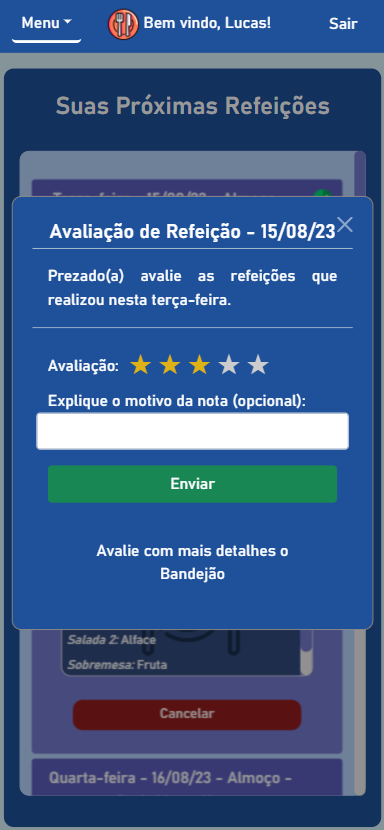
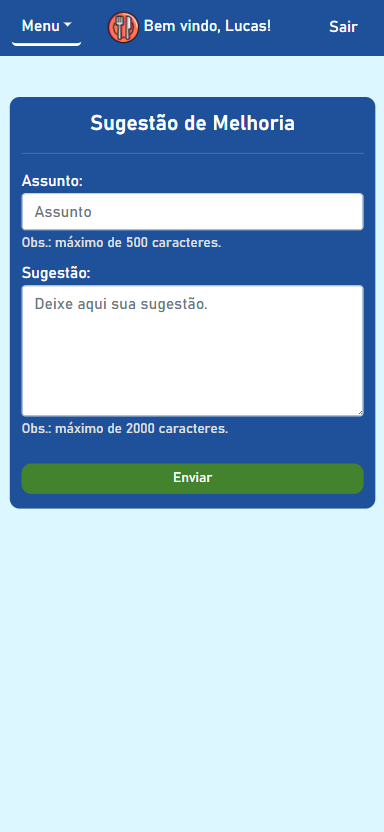
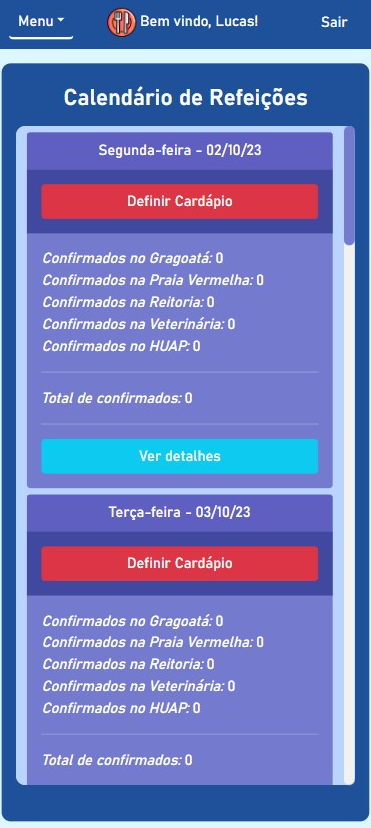
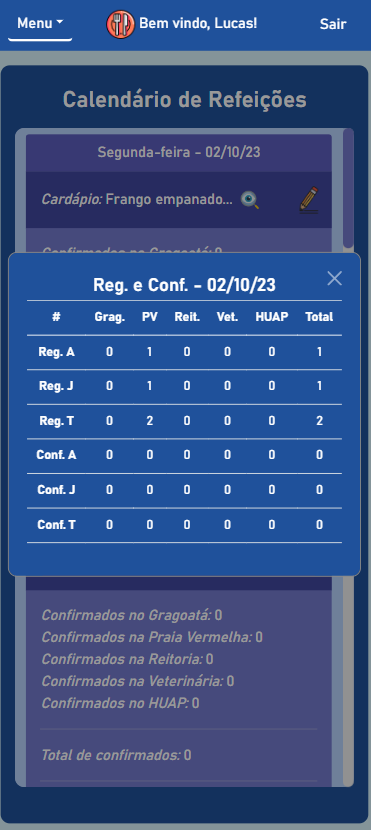
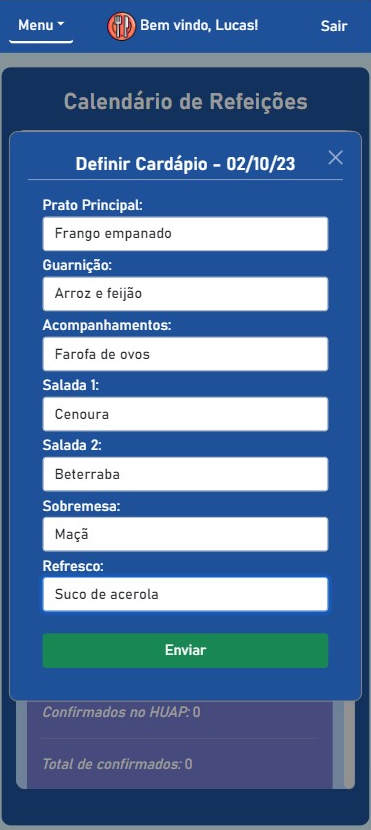
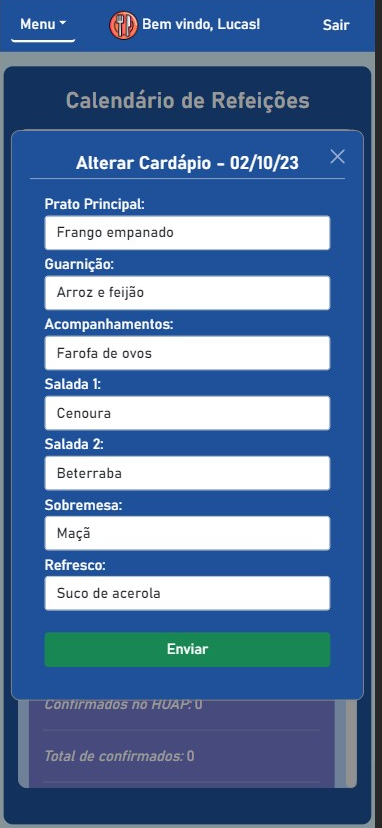
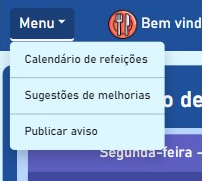
BandejApp is a management system for university restaurants designed to reduce food waste by providing more efficient management. The application allows users to pre-register their meals, confirm attendance, evaluate service quality, and submit improvement suggestions. Administrators have access to detailed data on the number of people who registered and confirmed their attendance, enabling better planning of the food quantities to be prepared and redistributed among the university restaurant’s units. Additionally, administrators can publish announcements and view user suggestions and reviews.
This project was conceived by Letícia de Oliveira Gago and, under the guidance of Flávio Luiz Seixas, several meetings were conducted to develop a technological solution to reduce food waste in university restaurants, ultimately leading to the creation of BandejApp. After the application was fully operational, a usability test was conducted using the SUS (System Usability Scale), which yielded satisfactory results. (more details).
The project was presented to the Superintendency of Information Technology at the Fluminense Federal University for incorporation into the university restaurant’s official application. Currently, this integration is in the implementation phase.
If you want to make sure your deployed pinner is working correctly, there is a
utility-test that you can run with npm run test:post-deploy that will ensure
your deployed pinner works correctly.
First you need to export environment variables to ensure the assertion values
are correct for your environment, then you can run the test. Example:
export PEER_BASE_APP_NAME=peer-pad/2
export PEER_BASE_SWARM_ADDRESS=/dns4/localhost/tcp/9090/ws/p2p-websocket-star
export PEER_BASE_PINNER_ID=Qmb9WDZUnUzEmZwkbMMGi4cV65F1sqcQa49dfZy9baRBJo
npm run test:post-deploy
Peer-base and the IPFS implementation in JavaScript is a work in progress. As such, there’s a few things you can do right now to help out:
Check out existing issues. This would be especially useful for modules in active development. Some knowledge of IPFS may be required, as well as the infrastructure behind it – for instance, you may need to read up on p2p and more complex operations like muxing to be able to help technically.
Perform code reviews. More eyes will help (a) speed the project along, (b) ensure quality, and (c) reduce possible future bugs.
Runs the app in the development mode.
Open http://localhost:3000 to view it in the browser.
The page will reload if you make edits.
You will also see any lint errors in the console.
yarn test:unit
Launches the test runner in the interactive watch mode.
See the section about running tests for more information.
yarn build
Builds the app for production to the build folder.
It correctly bundles React in production mode and optimizes the build for the best performance.
The build is minified and the filenames include the hashes.
Your app is ready to be deployed!
See the section about deployment for more information.
yarn eject
Note: this is a one-way operation. Once you eject, you can’t go back!
If you aren’t satisfied with the build tool and configuration choices, you can eject at any time. This command will remove the single build dependency from your project.
Instead, it will copy all the configuration files and the transitive dependencies (webpack, Babel, ESLint, etc) right into your project so you have full control over them. All of the commands except eject will still work, but they will point to the copied scripts so you can tweak them. At this point you’re on your own.
You don’t have to ever use eject. The curated feature set is suitable for small and middle deployments, and you shouldn’t feel obligated to use this feature. However we understand that this tool wouldn’t be useful if you couldn’t customize it when you are ready for it.
Map of the Structural Condition of Public Squares in Campinas –
Conducted on-site experience analysis of public squares in Campinas with an area greater than 1000m² for social investments and hosting major events.
Tools: QGIS (Spatial Analysis), R (Statistical Analysis and ETL)
Map of Violence in Campinas, São Paulo, Brazil, from 2011 to 2017 –
Experience analyzing a dataset from Policia Civil of the São Paulo State with a focus on spatial analysis of youth homicides in the city of Campinas. Tools: QGIS (Spatial Analysis), R (Statistical Analysis and ETL)
Spatial Data Infrastructure of Embrapa
Experience working with spatial metadata (ISO 19115) and conducting spatial analysis for the company.
Tools: QGIS (Geoservices and Geoprocessing), R (ETL and Statistical Analysis)
erDiagram
    CUSTOMER ||--o{ ORDER : "入れる"
    ORDER ||--|{ LINE-ITEM : "含む"
    CUSTOMER }|..|{ DELIVERY-ADDRESS : "使う"
erDiagram
    CUSTOMER ||--o{ ORDER : "入れる"
    ORDER ||--|{ LINE-ITEM : "含む"
    CUSTOMER }|..|{ DELIVERY-ADDRESS : "使う"
Loading
erDiagram
    CUSTOMER ||--o{ ORDER : "入れる"
    CUSTOMER {
        string name
        string custNumber
        string sector
    }
    ORDER ||--|{ LINE-ITEM : "含む"
    ORDER {
        int orderNumber
        string deliveryAddress
    }
    LINE-ITEM {
        string productCode
        int quantity
        float pricePerUnit
    }
Loading
複雑なサンプル:
erDiagram
    CAR ||--o{ NAMED-DRIVER : "許可する"
    CAR {
        string allowedDriver FK "許可されたドライバーのライセンス"
        string registrationNumber
        string make
        string model
    }
    PERSON ||--o{ NAMED-DRIVER : "である"
    PERSON {
        string driversLicense PK "ライセンスナンバー"
        string firstName
        string lastName
        int age
    }
You might be suprised to learn about Wikipedia Speedruns, where the goal is to get from a starting article to a target article in the shortest amount of clicks and time possible. Although Wikipedia Speedrun websites exist, this project seeks to “gameify” the Wikipedia experience whilst simultaneously allowing users to familiarise themselves with wiki structures and find information more efficiently.
Some of the features that set Competitive Wikipedia apart are:
A truly fair speedrun clock that account for loading times and has a pause function
Anti-cheat measures, such as control/f or cmd/f attempts and inspector injects (potentially)
A competitive environment, with both local and online leaderboards, as well as shops where players can purchase buffs and advantages
See the open issues for a full list of proposed features (and known issues).
Contributing
Contributions are what make the open source community such an amazing place to learn, inspire, and create. Any contributions you make are greatly appreciated.
If you have a suggestion that would make this better, please fork the repo and create a pull request. You can also simply open an issue with the tag “enhancement”.
Don’t forget to give the project a star! Thanks again!
Fork the Project
Create your Feature Branch (git checkout -b feature/YourFeature)
Commit your Changes (git commit -m 'Add YourFeature')
Push to the Branch (git push origin feature/YourFeature)
Open a Pull Request
License
Distributed under the MIT License. See MIT License for more information.


.png)


")
.png "Dashboard (upcoming meals)")


")
")


")


")