Author: 27nlf2qrc0jd

  • common4go

    common4go

    Common Go lang data structures, utilities, Future Task etc
    If you are java programmer, It will help you.

    List, HashMap, HashSet
    gorouter pool(thread pool), Future Task
    basic number conversion
    common logs(in dev)

    Installation

    With Go and git installed:

    go get github.com/loveinsky100/common4go
    

    Data Structures

    List

    1.ArrayList
    2.SyncArrayList

    	type List interface {
    		// add item to list
    		Add(value interface{})
    	
    		// get index item
    		Get(index int) (interface{}, bool)
    	
    		// remove item
    		Remove(index int) bool
    	
    		// loop item
    		Foreach(consumer func(value interface{}, index int) bool)
    	
    		// get item len
    		Size() int
    	}

    	// create array list
    	list := collections.NewArrayList()
    
    	// create sync array list
    	list := collections.NewSyncArrayList()
    
    	// create sync list base on array list
    	list := collections.NewSyncList(collections.NewArrayList())

    Map

    1.HashMap
    2.SyncHashMap

    type Map interface {
    	Put(key interface{}, value interface{})
    
    	Remove(key interface{})
    
    	Get(key interface{}) (interface{}, bool)
    
    	Foreach(consumer func(key interface{}, value interface{}) bool)
    }

    	// create hash map
    	hashMap := collections.NewHashMap()
    
    	// create sync hash map
    	hashMap := collections.NewSyncHashMap()

    Set

    1.HashSet

    type Set interface {
    	
    	Add(key interface{})
    
    	Remove(key interface{})
    
    	Contains(key interface{}) bool
    
    	Foreach(consumer func(key interface{}) bool)
    }

    	// create hash set
    	hashSet := collections.NewHashSet()
    
    	// create sync hash set
    	hashSet := collections.NewSyncHashSet()

    Future Task

    Future

    you can you use future task like java, and also you need use future task in a go router pool, such like thread pool in java, but go router pool is diffrent between thread pool, it only provide max pool size and reject handler, there are no min pool size or wait queue.

    type GoRouterPool interface {
    	Add(callable Callable) (Future, error)
    	AddHandler(handler func() (interface{}, error)) (Future, error)
    }
    
    type Future interface {
    	// wait until task done or panic
    	Get() (interface{}, error)
    
    	// wait until task done or timeout, notice: when task timeout it will still running in background until return method
    	GetWithTimeout(timeout time.Duration) (interface{}, error)
    
    	// cancel task, when task not enter, you can cancel it, true: cancel success false:
    	Cancel() bool
    
    	// check is done or in other status
    	Status() FutureStatus
    
    	// execute task, you need not call is when you put it in routers pool
    	Execute()
    }

    how to use

    	pool := routers.NewGoRouterPool(10, &routers.CallableRejectedHandler {
    		Handler: func(callable routers.Callable) {
    			// do some thing
    		},
    	})
    
    	future, err := pool.AddHandler(func() (interface{}, error) {
    		time.Sleep(time.Millisecond * 100)
    		return 1, nil
    	})
    
    	if err != nil {
    		// reject
    		t.Errorf("an error occured: reject", err)
    	}
    
    	v, err := future.GetWithTimeout(time.Millisecond * 200)
    	if err != nil {
    		t.Errorf("an error occured: %+v", err)
    	}

    number conversion

    numbers.ToInt64(int8(120))
    numbers.ToFloat64("2.198900")
    numbers.ToString(2.198900)
    numbers.ToBool(1)
    numbers.ToBool("FALSE")

    dev

    schedule task like EventLoop & EventLoopGroup

    linked list

    queue & stack & cache

    logs

    Visit original content creator repository
    https://github.com/loveinsky100/common4go

  • TESS_diagnosis

    TESS_diagnosis

    Now it is a GUI!

    Overview

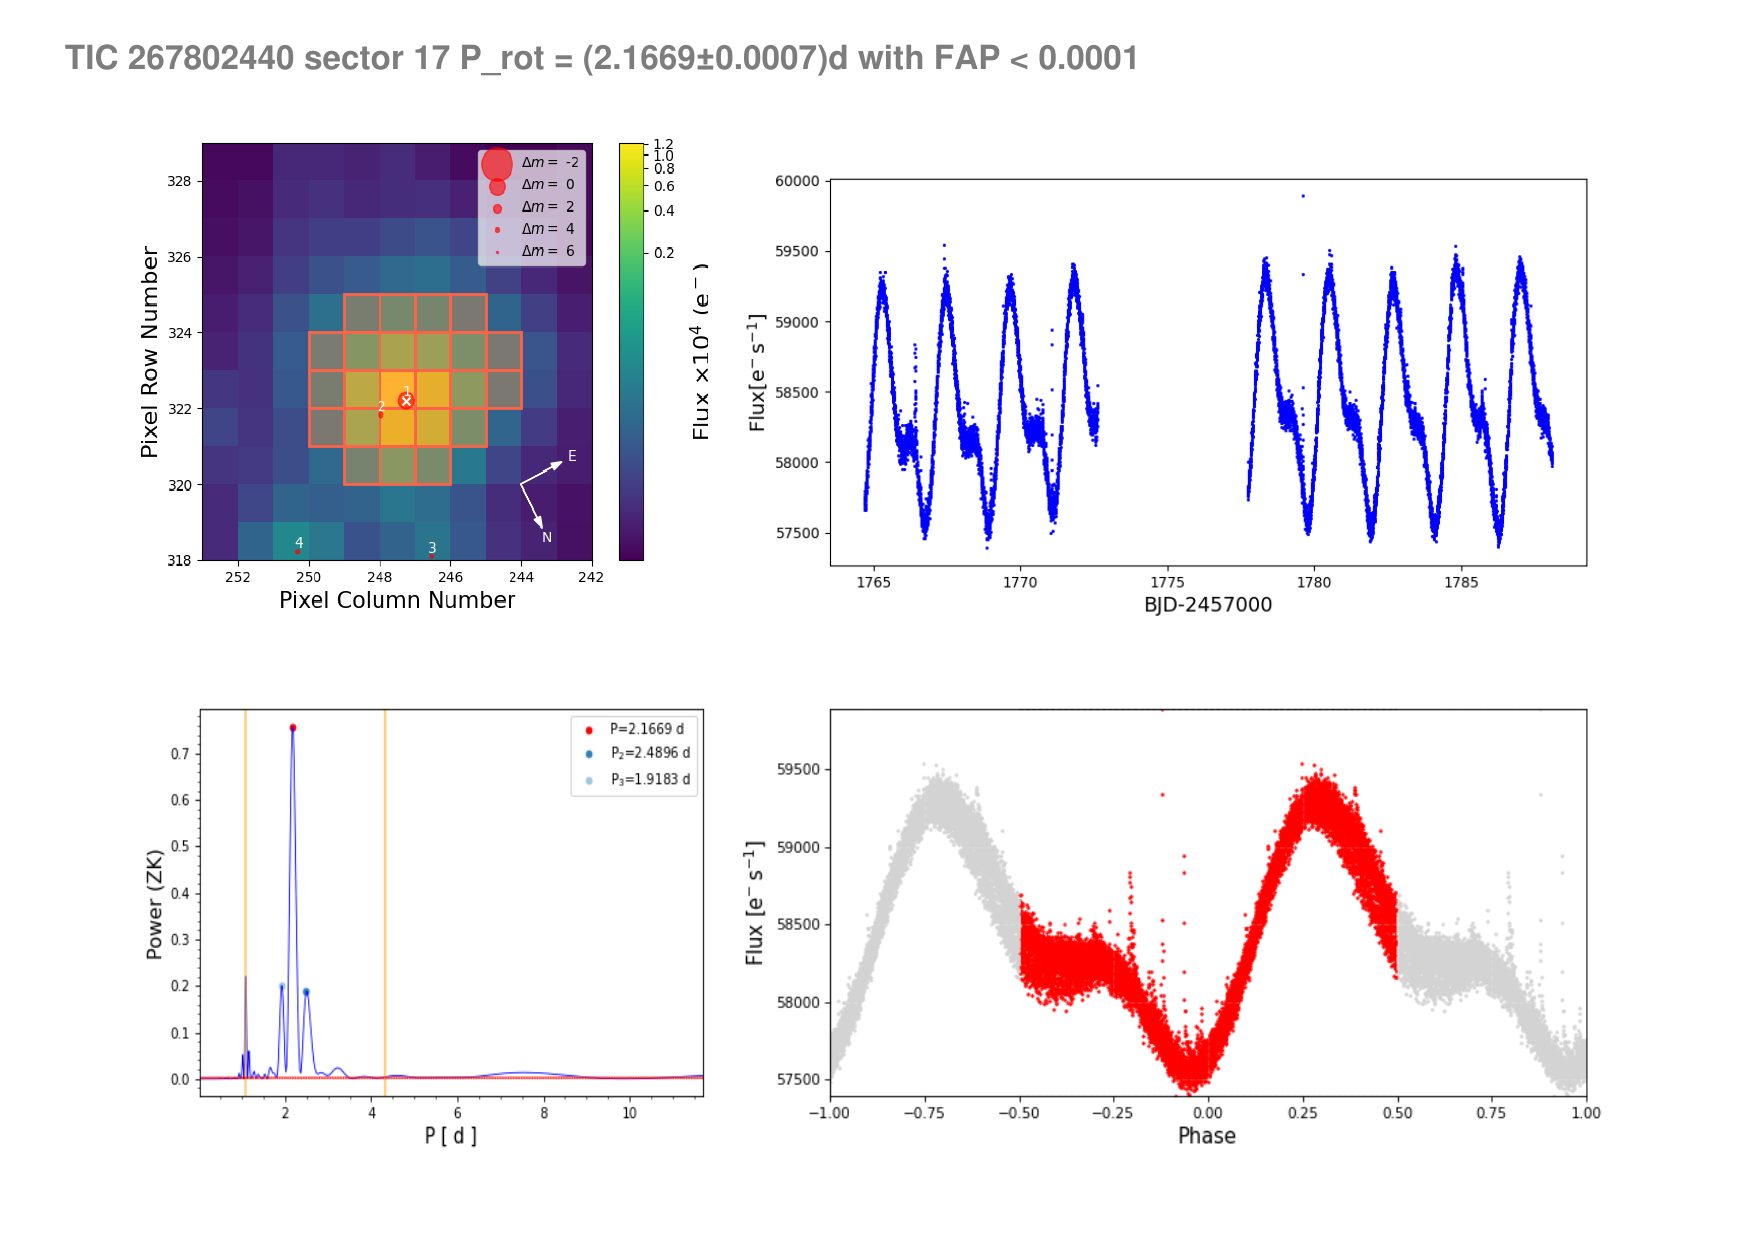
    This tool has been developed to find and validate periodic signals in TESS 2-minute cadence light curves. It allows the user to download the target pixel file (TPF) and light curve given a TIC number and TESS sector, implement the GLS periodogram on the data to find the stellar rotational period and phase-fold the light curve.

    It is possible to generate a one-page PDF summary with the obtained period and four figures:

    1. TPF with TESS aperture mask
    2. TESS light curve
    3. Periodogram
    4. Folded light curve

    Details

    The TPF plot is created using a fork of the Python3 version of tpf plotter by J. Lillo-Box (publicly available in https://github.com/jlillo/tpfplotter), which also uses the Python packages astropy, lightkurve and numpy.

    Periods are calculated using the Generalised Lomb-Scargle periodogram by M. Zechmeister (publicly available in https://github.com/mzechmeister/GLS). For this, photometric points which deviate more than 5 standard deviations from the average flux are removed, so the effect flares, transits or eclipses in the calculated rotational period is reduced.

    As TESS targets are observed at a 2 minute cadence and each sector is observed for 27 days, the periodogram will look for periods between about 4 minutes and about 13.5 days.

    The periodogram plot contains three horizontal lines corresponding to False Alarm Probabilities (FAP) of 10%, 1% and 0.1%. It also includes two vertical lines that mark the periods corresponding to double and half the period given by the main periodogram peak.

    The phase folded light curve plot is limited to points that deviate less than 10 standard deviations from the mean flux. Two dashed lines show the 5 limit used for the GLS. This is done to better show the star’s variability.

    Requirements

    TESS_diagnosis is written in Python3.8. The following packages need to be installed:

    Additionally, the GLS periodogram must be installed following the instructions given by its author: https://github.com/mzechmeister/GLS/tree/master/python.

    The GUI version (TESSdiagnosis_GUI.py) is constructed using PySimpleGUI v4.55.1 (https://github.com/PySimpleGUI/PySimpleGUI), so you must install it if you want to use the GUI.

    How to use

    Clone or download this folder.

    GUI

    To launch the GUI:

    python3 TESSdiagnosis_GUI.py
    

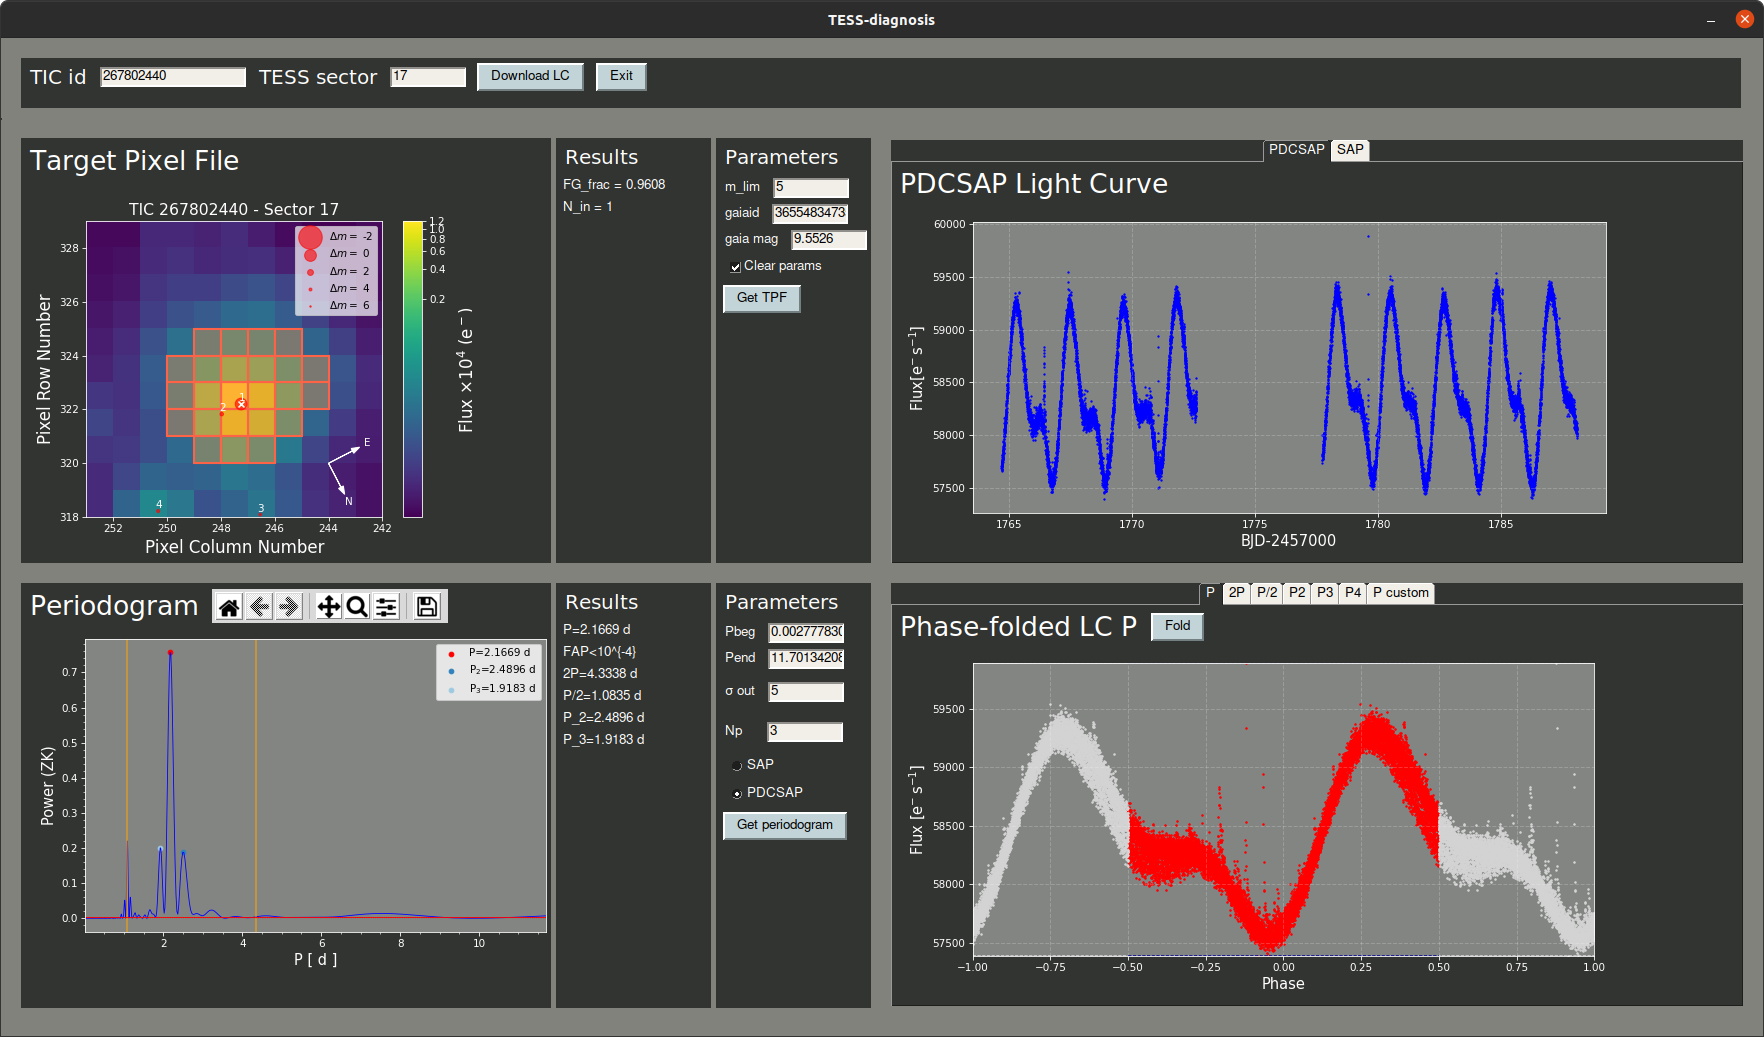
    There are four panels: the Target Pixel File, the Light Curve, the Periodogram and the Phase-folded Light Curve.

    An example is shown for FF And:

    alt text

    Once you specified the TIC number and sector, click on “Dowload LC” to download the light curve and plot it in its corresponding panel. You can check both SAP and PDCSAP light curves.

    For the periodogram, you can change different parameters:

    • Pbeg and Pend: the smallest and largest periods for the periodogram. The default values are calculated as twice the sampling rate and half of the total baseline.
    • The standard deviation threshold used to remove outliers. The default value is 5.
    • Np: the number of peaks that will be marked in the plot (defaults to 3). Secondary peaks too close to the main period, half of the main period and twice the main period are ignored.

    You can also select to perform the periodogram on the SAP or PDCSAP light curve.

    Once the periodogram is calculated, multiple results are shown:

    • P: the period corresponding to the main peak.
    • FAP: the false alarm probability of the main peak.
    • 2P: the period corresponding to twice the main peak.
    • P/2: the period corresponding to half the main peak.
    • P_n: the period of the n-th peak found in the periodogram.

    After calculating the periodogram, the user can plot the phase-folded light curve using the periods P, 2P, P/2 and P_n by clicking on the “Fold” button in the Phase-folded LC panel. A tab with the name “P custom” allows to phase-fold the light curve using an arbitrary period (in days).

    The Target Pixel File panel allows to plot the TPF and the aperture mask used for the SAP and PDCSAP light curves. Gaia sources found in the field are also ploted, using circles of varying sizes depending on their magnitude. The user can introduce the following parameters:

    • m_lim: the limiting magnitude for stars in the TPF to be ploted, compared to the target star. Defaults to 5.
    • gaiaid: Gaia id number of the target. If it is not specified, the program will look for a Gaia identifier in the TIC catalog.
    • gaia mag: the Gaia g band magnitude of the target star. If it is not specified, the program will look for it in the TIC catalog.

    The results columns will show two values: -FG_frac: the fraction of the Gaia g band flux corresponding to the target star compared to the sum of all stars found inside the aperture mask. -N_in: the number of sources found inside the aperture mask that are not the target star.

    Terminal

    If you just want to get the PDF repor, you can do it by typing:

    python3 TESSdiagnosis.py {TIC} {sec}
    

    where TIC and sector are the TESS Input Catalog ID of the star and sec the sector in which it was observed. The GLS will be performed on the PDCSAP light curve by default.

    As an example, FF And has the TIC number 26780244, which is in the 17th TESS sector. To generate the diagnosis pdf, we simply use the command line:

    python TESS_diagnosis.py 267802440 17
    

    If you want to use the SAP flux instead of the PDCSAP, then add --SAP to the comand line:

    python TESS_diagnosis 267802440 17 --SAP
    

    The output pdf looks like this:

    alt text

    Additionally, a csv file is created specifying the period, its error and its FAP.

    Credits

    If you use TESS_diagnosis, please cite:

    • Skrzypinski, S. L, MSc thesis, Universidad Complutense de Madrid, Spain, 2021.

    • Revilla, D., MSc thesis, Universidad Complutense de Madrid, Spain, 2020.

    Besides you should also give credit to the authors of tpfplotter and GLS, and their papers:

    • Aller, A., Lillo-Box, J., Jones, D., et al. (2020, A&A, 635, 128) “Planetary nebulae seen with TESS: Discovery of new binary central star candidates from Cycle 1,” ADS link

    • M. Zechmeister & M. Kürster, The generalised Lomb-Scargle periodogram. A new formalism for the floating-mean and Keplerian periodograms, 2009, ADS link

    Visit original content creator repository https://github.com/SLSkrzypinski/TESS_diagnosis
  • AndroidLowLevelDetector

    AndroidLowLevelDetector

    Android CI Dependabot Updates Dependency Submission

    Detect Treble, GSI, Mainline, APEX, system-as-root(SAR), A/B, etc. .
    Some source codes refer to Magisk, OpenGApps, TrebleInfo, TrebleCheck, etc. .

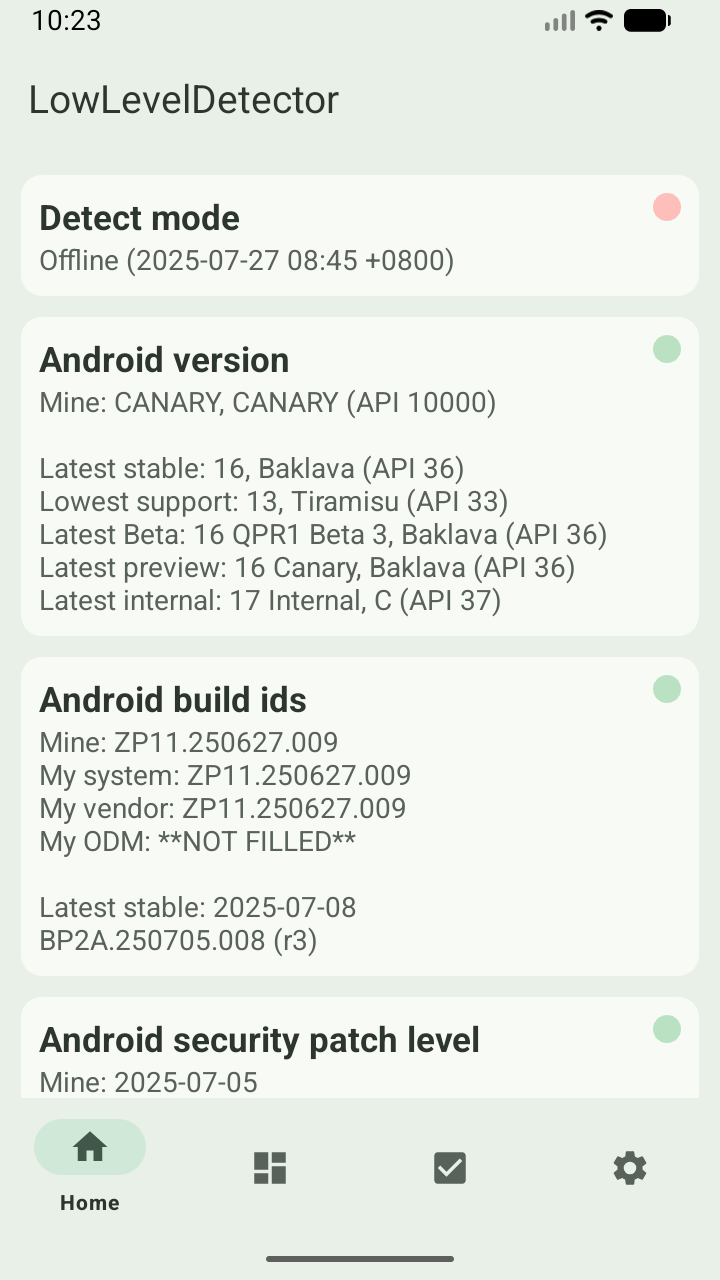
    Dark Light

    Source

    1. https://github.com/imknown/AndroidLowLevelDetector
    2. https://gitee.com/imknown/AndroidLowLevelDetector (Mirror)

    Download

    1. https://play.google.com/store/apps/details?id=net.imknown.android.forefrontinfo
    2. https://github.com/imknown/AndroidLowLevelDetector/releases
    3. https://gitee.com/imknown/AndroidLowLevelDetector/releases (Mirror)

    Features

    Click me
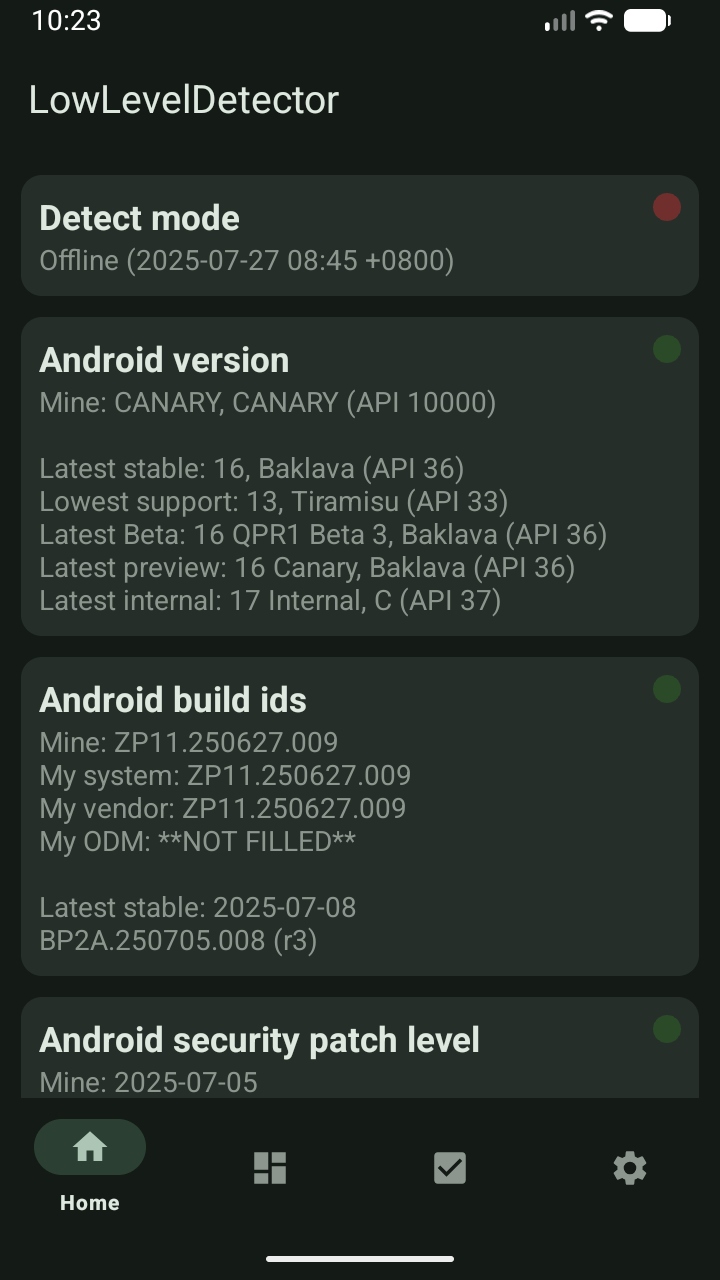
    • Detect Android version
    • Detect Android Build Id version
    • Detect Android security patch level
    • Detect Vendor security patch level
    • Detect Project Mainline module version (Google Play system update)
    • Detect Linux kernel
    • Detect A/B or A-Only
    • Detect Dynamic Partitions
    • Detect Dynamic System Update(DSU)
    • Detect Project Treble
    • Detect GSI compatibility
    • Detect Binder bitness
    • Detect Process/VM architecture
    • Detect Vendor NDK
    • Detect System-as-root
    • Detect (flattened) APEX
    • Detect Toybox
    • Detect WebView implement
    • Detect outdatedTargetSdkVersion apk
    • Dark mode supported
    • Online/offline mode (fetching data from remote server or local)
    • MultiWindow/FreeForm/Foldable/Landscape supported
    • Etc.

    Contribute

    Just use Pull Request.
    Translations are also welcome.

    Build

    Flavor

    • Firebase
      The Google Play version.
      Will collect your information then upload,
      using Firebase Analytics & Crashlytics.
      Follow Firebase Official Guide.
      See Privacy Policy.

    • FOSS (Default)
      Will NOT collect your information.
      See Free and open-source software.

    Release

    Provide the whole following properties in file $rootDir/local.properties:

    storeFile=<Yours>
    storePassword=<Yours>
    keyAlias=<Yours>
    keyPassword=<Yours>

    The location of storeFile can be ../keys/release.jks.
    It has been already ignored in file $rootDir/.gitingore by default.
    So you can put your own private certificate or signing key there safely.

    Visit original content creator repository https://github.com/imknown/AndroidLowLevelDetector
  • telegram-ngrok-bot

    Telegram Ngrok Bot

    A simple bot to fetch the running tunnels from ngrok api.

    Prerequisits

    • Ngrok agent should be running.

    Configuration

    Ngrok config

    version: "2"
    authtoken: xxxxxx_xxxx
    api_key: xxxxxx_xxxx
    # other configurations
    # full example -> https://ngrok.com/docs/agent/config/#full-example

    Bot Config

    token: xxxx:xxxx_x
    chat_id: -xxxx # to get the chat ids -> https://api.telegram.org/bot<replace-with-bot-id>/getUpdates
    ngrok_api_url: https://api.ngrok.com/tunnels

    Development

    cargo run -- --config path/to/bot-config-file.yml  --ngrok-config path/to/ngrok-config.yml

    Production

    telegram_ngrok_bot --config path/to/bot-config-file.yml  --ngrok-config path/to/ngrok-config.yml

    Available Commands

    Usage: telegram_ngrok_bot --config <FILE> --ngrok-config <FILE>
    
    Options:
      -c, --config <FILE>        Sets a config file
      -n, --ngrok-config <FILE>  Sets a ngrok config file
      -h, --help                 Print help
      -V, --version              Print version

    Daemonize the bot with systemctl for linux

    telegram_ngrok_bot.service

    [Unit]
    Description=Telegram ngrok bot to fetch the active tunnels
    ConditionFileIsExecutable=<replace-with-path-to>/telegram_ngrok_bot
    
    [Service]
    StartLimitInterval=5
    StartLimitBurst=10
    ExecStart=<replace-with-path-to>/telegram_ngrok_bot "--ngrok-config" "<replace-with-path-to>/ngrok.yml" "--config" "<replace-with-path-to>/telegram_ngrok_bot/bot.yml"
    
    
    Restart=always
    RestartSec=15
    [Install]
    WantedBy=multi-user.target

    Demo

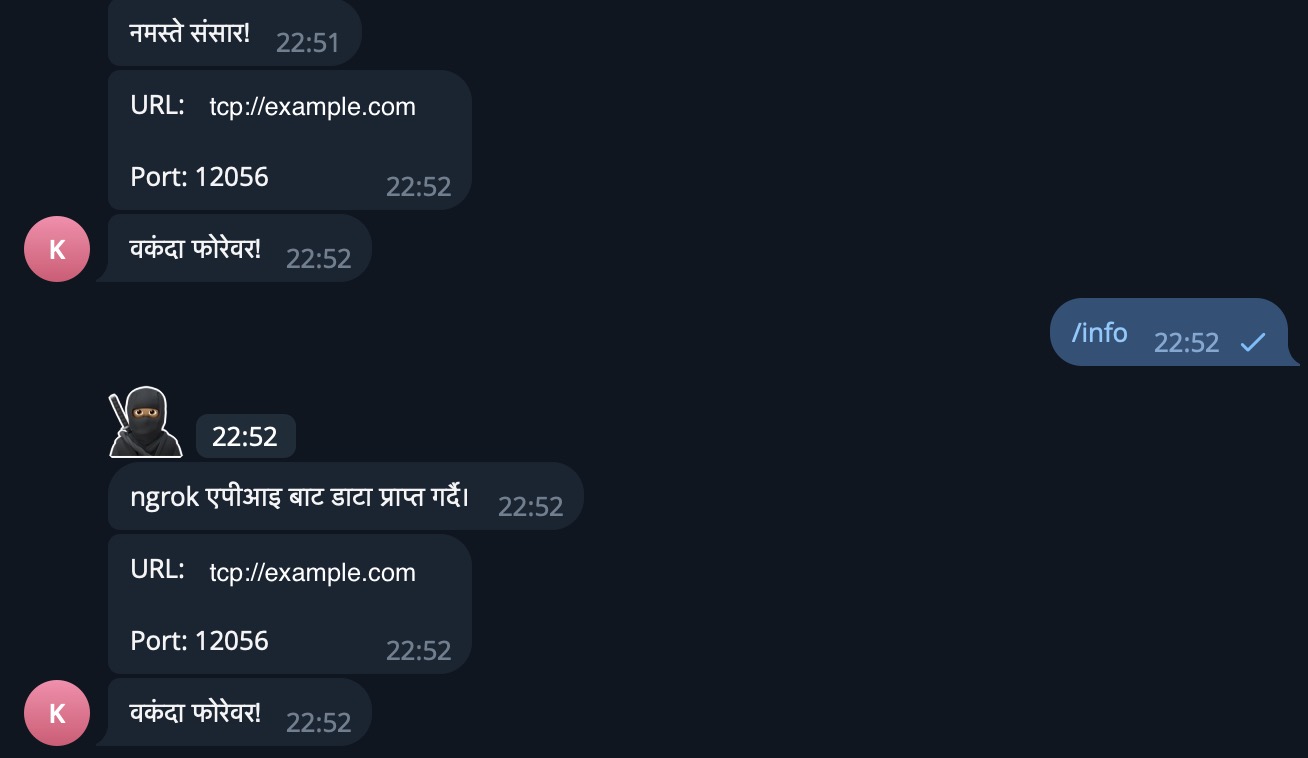
    bot

    Visit original content creator repository https://github.com/ishandongol/telegram-ngrok-bot
  • lyriks-music-player

    Project Lyrics

    Develop an elegant React.js Music Application.

    Check out the complete project requirements here

    Contributing

    When contributing to this repository, please first discuss the change you wish to make via issue.
    Please note we have a code of conduct, please follow it in all your interactions with the project.

    System Requirements

    To get started with development, you need to install few tools

    1. git

      git version 2.13.1 or higher. Download git if you don’t have it already.

      To check your version of git, run:

       git --version
    2. node

      node version 16.15.1 or higher. Download node if you don’t have it already.

      To check your version of node, run:

       node --version
    3. npm

      npm version 5.6.1 or higher. You will have it after you install node.

      To check your version of npm, run:

       npm --version

    Setup

    To set up a development environment, please follow these steps:

    1. Clone the repo

       git clone https://github.com/JavaScript-Mastery-PRO/project1_team4_repository.git
    2. Change directory to the project directory

      cd project1_team4_repository
    3. Install the dependencies

       npm install

      If you get an error, please check the console for more information.

      If you don’t get an error, you are ready to start development.

    4. Run the app

      npm run dev

      Project will be running in the browser.

      Open http://localhost:3000 to view it in your browser.

    Issues

    You’ve found a bug in the source code, a mistake in the documentation or maybe you’d like a new feature? You can help us by submitting an issue on GitHub. Before you create an issue, make sure to search the issue archive — your issue may have already been addressed!

    Please try to create bug reports that are:

    • Reproducible. Include steps to reproduce the problem.
    • Specific. Include as much detail as possible: which version, what environment, etc.
    • Unique. Do not duplicate existing opened issues.
    • Scoped to a Single Bug. One bug per report.

    Pull Request

    There are 2 main work flows when dealing with pull requests:

    • Pull Request from a forked repository
    • Pull Request from a branch within a repository

    Here we are going to focus on 2. Creating a Topical Branch:

    1. First, we will need to create a branch from the latest commit on master. Make sure your repository is up to date first using

       git pull origin main

      Note: git pull does a git fetch followed by a git merge to update the local repo with the remote repo. For a more detailed explanation, see this stackoverflow post.

    2. To create a branch, use git checkout -b <new-branch-name> [<base-branch-name>], where base-branch-name is optional and defaults to main.

      Use a standard convention for branch names. For example, <your-name>-dev. It will be easier to track your pull requests if you use this convention.

      I’m going to create a new branch called jsm-dev from the main branch and push it to github.

       git checkout -b jsm-dev main
       git push origin jsm-dev
    3. To create a pull request, you must have changes committed to your new branch.

    4. Go to Pull Requests and click on the New Pull Request button.

    5. Select the main branch as the base branch and the jsm-dev branch as the compare branch.

    6. Follow the template and fill in the proper information for the pull request.

    7. Click on the Submit button.

    8. You have successfully created a pull request. Now wait for mentor approval. Once approved, you can merge the pull request.

    Visit original content creator repository
    https://github.com/puruhitaaa/lyriks-music-player

  • editor

    tiptiz WYSIWYG editor

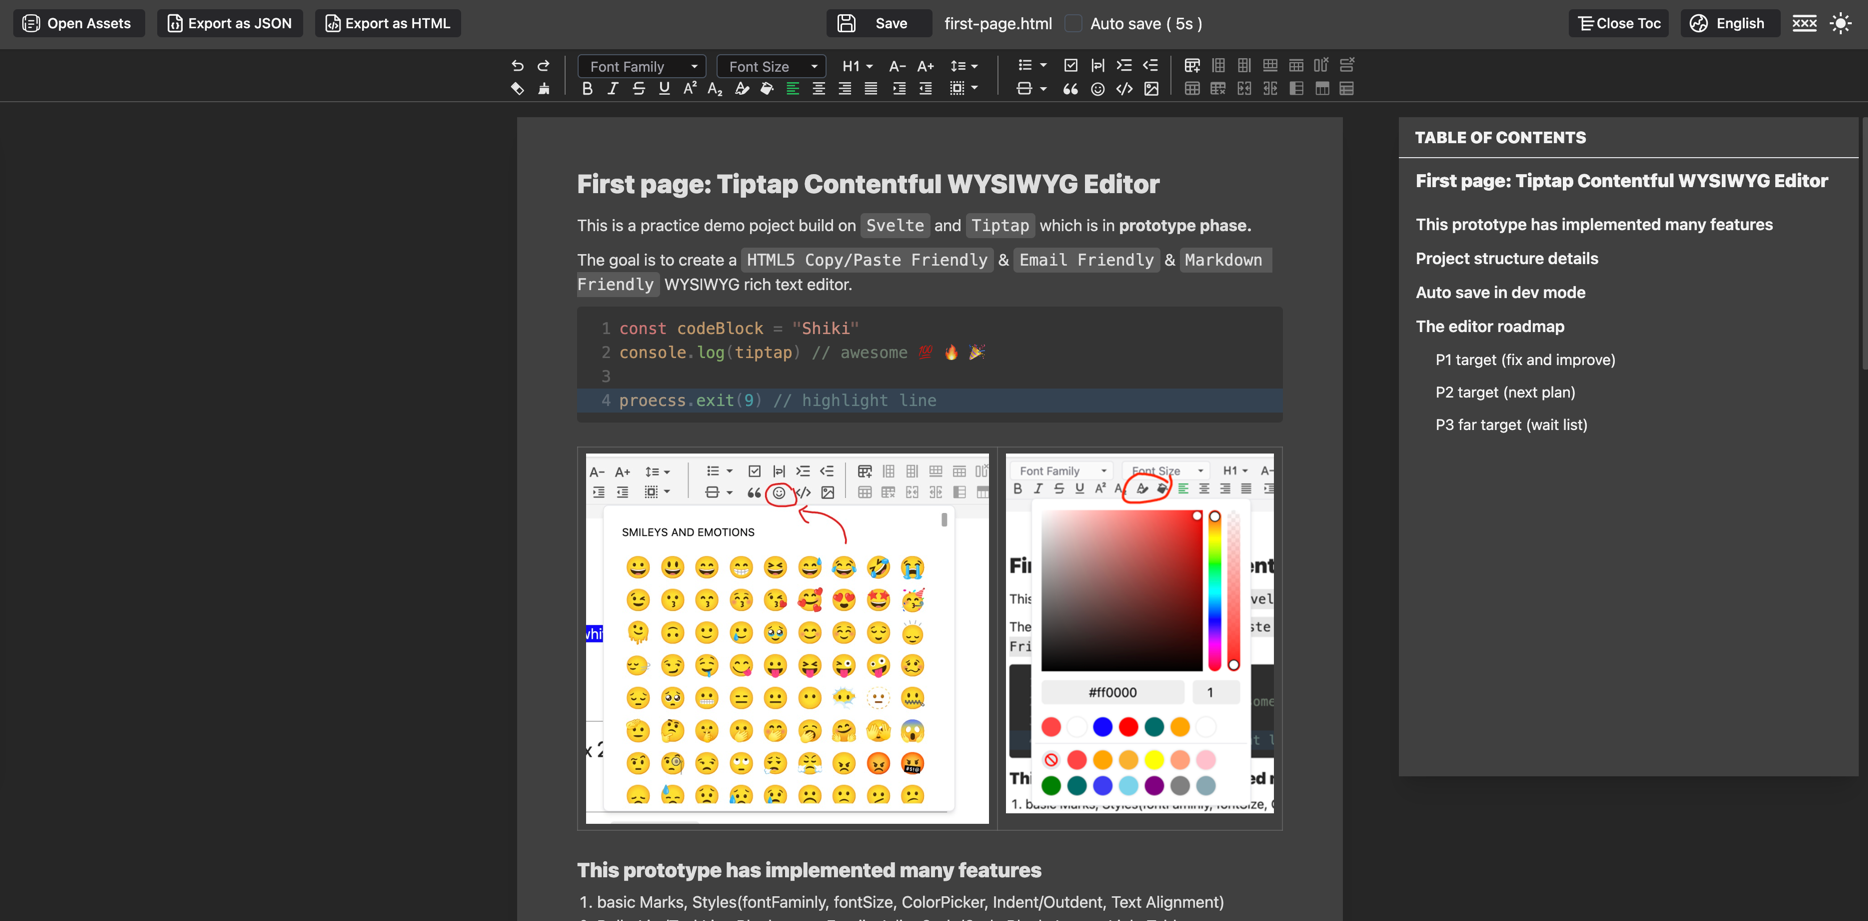
    Light Mode Dark Mode
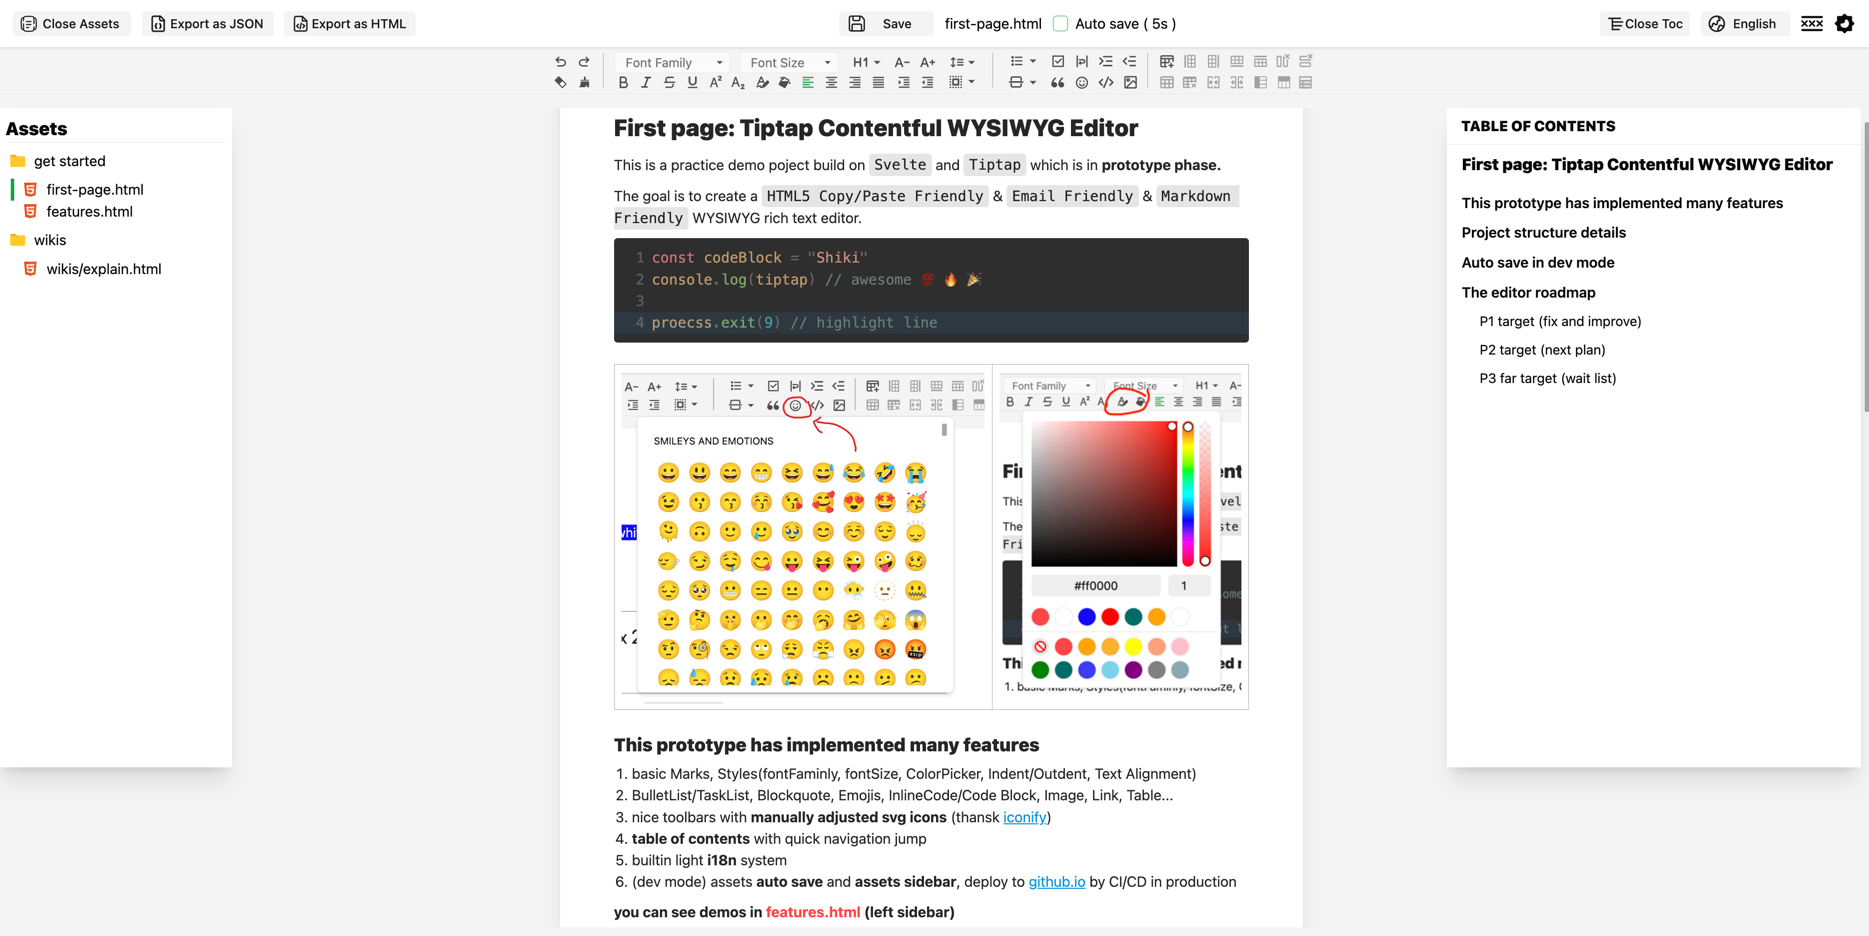
    first view first view 2

    当前项目刚结束探索阶段,基于SvelteTiptap实现一个WYSIWYG富文本编辑器,目前能通过 技术手段实现再github pages部署静态文档,但不够开箱即用,还处于很原型的阶段。

    项目的目标是实现一个HTML5 Copy/Paste友好 & Email格式友好 & Markdown友好的WYSIWYG富文本编辑器。 编辑器将用于个人博客、邮件编辑器、博客文章快速复制粘贴到微信公众号、掘金、知乎等平台发布。

    我在playground里持续补充文档和新的,希望能帮助到各位想入门编辑器开发的开发者。目前实现的功能:

    1. 基本的标记(Marks),文本样式(TextStyl: 字体、字号、颜色、背景色、缩进、对齐等)
    2. 列表(无序、有序、任务列表),引用,表情,行内代码、代码块,图片,链接,表格等
    3. 已经初具规模的工具栏,(没有UI)图标完全手工调整对齐的svg icon一套,感谢 iconify
    4. 目录,快速跳转
    5. 简单实现的一个i18n功能
    6. (开发模式)自动保存功能,资源管理侧边栏,CI/CD部署到github.io

    ❗️❗️❗ 项目仍处于原型阶段,还有许多功能需要实现,每天都变化很快。如果您有任何建议或想法,请随时提出问题(目前变动很大很快,暂不接受PR)🙏 ❗️❗️❗ Dev Mode下的自动保存目前仅Swap文件,打包前记得手动复制过去(实在是没实现自动交换和保存,后面会做桌面应用)

    编辑器功能兼容新测试表(快速更新中🚀🚀🚀)

    issue记录: #29

    • 当前实践状态:
      ✅ 支持; ❌ 不支持; ⏳ 正在开发; 🚧 计划中;
    • 其他编辑器状态:
      🆗 部分支持; 📋 粘贴支持;
    • 空着表示没测试或者没必要测试
    features 本编辑器 微信公众号 知乎 markdown 掘金富文本
    Undo/Redo
    clear marks
    bold
    italic
    inline code
    strike
    superscript
    subscript
    underline
    fontFamily
    fontSize
    HeadingLevel
    link
    blockquote
    fontColor
    bgColor
    Clear font/bg color only
    Hr
    BulletList ✅ ❓
    TaskList
    Emoji Picker (builtin component)
    Text Alignment
    Indent/Outdent
    LineHeight
    TextStyle Margin
    Table ✅❓
    Table Head/Cell Toggle 📋 🆗❓3
    Table Cell Merge/Split 📋
    Table Row Add/Delete
    Table Col Add/Delete
    Code Block
    Image
    Table Layout 🚧
    Float layout 🚧

    ❓3: 知乎表格最左侧支持toggle表头,顶部表头切换报错

    项目结构(欢迎交流)

    • packages/*: 自定义组件、公共库都在这里(暂无发布npm计划).
    • example: demo playground实现的完整代码.
    • example/dev-server.mjs: 开发模式下提供 /content api 进行文件读取保存的能力,vite通过middleware mode集成.
    • src/App.svelte: 主页面(就这一个),编辑器和工具栏,编辑器状态上下文
    • src/icons/toolbars: 所有工具栏用到svg icon,整套手工调整对齐
    • src/icons/*: 其他SVG icon.
    • src/components/ui: shadcn-svelte components, 配置文件 src/components.josn
    • src/components/Toolbar.svelte: 工具栏的入口文件.
    • src/components/toolbars/*.svelte: 所有的工具栏交互按钮、调用Editor实现的功能代码文件都在这里.
    • src/states/*.svelte.ts: 全局状态,参照vue的store理解. (editor state, theme, color picker histories …)
    • src/assets/noto-emojis-v16.json: Google Emoji图标元数据文件(NotoEmoji metadata json file).
    • public/NotoColorEmoji.ttf: Google Emoji字体(NotoEmoji font file),没有这个字体,有些emoji在windows上不可渲染,有其他字体实现也可以的.

    dev server

    目前保存文件仅能通过dev mode(node dev-server.mjs)实现,dev启动非常简单(如下)。

    dev模式保存在example/src/assets下的HTML文件会被github action复制到部署的github pages里。

    > git clone https://github.com/tiptiz/editor.git --depth=1
    > cd editor
    > fnm install/use # optional
    > pnpm install
    > cd exmaple 
    > node dev-server.mjs # also pnpm server, or you can't use local save
    Visit original content creator repository https://github.com/tiptiz/editor
  • OhNoPub.MefCacher

    Build status

    There are two goals to this project:

    1. Enable the most general and declarative MEF usage pattern (i.e., using ApplicationCatalog). When buying into a composition pattern, it is really nice to let the system follow a well-established and accepted set of conventions to orchestrate parts. Writing your own initialization code to reduce startup delays means ignoring these conventions/patterns and ends up mixing concerns and defeating the whole point of a composition pattern.

    2. Enable fast startup and initial composition. For MEF to compose a part with any imports, it needs to scan the entire catalog for parts to verify that the cardinality of the import is being respected. This defeats the framework痴 optimization of lazily loading assemblies and causes a noticable and unacceptable slowdown in program initialization, especially when allowing all assemblies in an application to contribute parts.

    MEF痴 catalogs allow a separation between a part instance and its definition. It should be possible to just feed MEF the part definitions necessary for it to validate cardinality constraints and decide which parts actually need to be activated. This way, assembly loading can be deferred using a lazy pattern until parts are actually needed in a manner similar to how .net lazily loads assemblies. If this is done, initial composition can be made responsive while still allowing a general catalog without need for manual tuning/specialization.

    The design of CachingCatalog supports automatic cache rebuilding and initialization. The idea is that you can detect that a particular assembly has changed without fully loading it用erhaps using filesystem-provided metadata such as mtime. During normal application use, the assembly would be stable. Thus, the program would build the cache on the first run and use it in subsequent runs. Or perhaps the cache can be prepopulated before distribution of the program.

    Because of the nature of the caching pattern, it is best if the cache can be assembly-aware. Thus, imitations of DirectoryCatalog and ApplicationCatalog called DirectoryCachingCatalog and ApplicationCachingCatalog are provided. The pattern I personally recommend is:

    using OhNoPub.MefCacher;
    using System.ComponentModel;
    using System.ComponentModel.Composition.Hosting;
    
    [Export]
    public class Program
    {
        [Import]
        public Whatever Whatever { get; set; }
        
        static int Main(string[] args)
        {
            using (var catalog = new ApplicationCachingCatalog())
            {
                using (var container = new CompositionContainer(catalog))
                {
                    return catalog.GetExportedValue<Program>().Run(args);
                }
            }
        }
    
        int Run(string[] args)
        {
            Whatever.DoSomething();
            return 0;
        }
    }
    

    And… that is the vision. It does not work quite so far yet. This repository however has a few test cases and some of the necessary scaffolding to support the future API. It might even almost be to the point of being interesting. Thus I’m sharing it ^^.

    Visit original content creator repository https://github.com/binki/OhNoPub.MefCacher
  • microcks-testcontainers-go-demo

    Microcks Testcontainers Go Demo

    Microcks Testcontainers Go demo

    This application is a demonstration on how to integrate Microcks via Testcontainers within your development inner-loop.

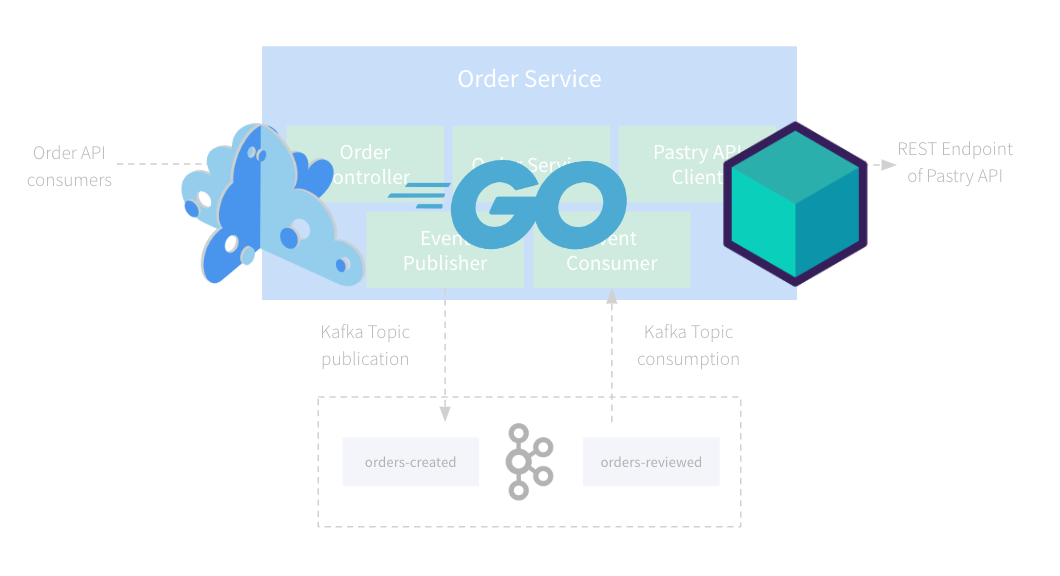
    You will work with a Go application and explore how to:

    • Use Microcks for provisioning third-party API mocks,
    • Use Microcks for simulating external Kafka events publishers,
    • Write tests using Microcks contract-testing features for both REST/OpenAPI based APIs and Events/AsyncAPI based messaging

    Table of contents

    License Summary

    The code in this repository is made available under the MIT license. See the LICENSE file for details.

    Running tests

    PollInterval:100ms skipInternalCheck:false} 2024/09/25 22:05:00 🔔 Container is ready: eb0f86cd914d 2024/09/25 22:05:00 🐳 Creating container for image quay.io/microcks/microcks-uber:1.9.0-native 2024/09/25 22:05:00 ✅ Container created: a7f410f91fb2 2024/09/25 22:05:00 🐳 Starting container: a7f410f91fb2 2024/09/25 22:05:01 ✅ Container started: a7f410f91fb2 2024/09/25 22:05:01 ⏳ Waiting for container id a7f410f91fb2 image: quay.io/microcks/microcks-uber:1.9.0-native. Waiting for: &{timeout: Log:Started MicrocksApplication IsRegexp:false Occurrence:1 PollInterval:100ms} 2024/09/25 22:05:01 🔔 Container is ready: a7f410f91fb2 2024/09/25 22:05:01 🐳 Terminating container: a7f410f91fb2 2024/09/25 22:05:01 🚫 Container terminated: a7f410f91fb2 — PASS: TestListPastries (1.27s) PASS ok github.com/microcks/microcks-testcontainers-go-demo/internal/client 1.586s’>
    $ go test -timeout 30s -run "^TestListPastries$" ./internal/client -v
    
    === RUN   TestListPastries
    2024/09/25 22:05:00 github.com/testcontainers/testcontainers-go - Connected to docker: 
      Server Version: 24.0.2
      API Version: 1.43
      Operating System: Docker Desktop
      Total Memory: 11962 MB
      Testcontainers for Go Version: v0.34.0
      Resolved Docker Host: unix:///var/run/docker.sock
      Resolved Docker Socket Path: /var/run/docker.sock
      Test SessionID: 96332d7af971d08d478592eca13f0c15f30f89ee17251b870f732595e9f5f341
      Test ProcessID: bfbf6820-0924-4e6a-b6f9-9eeb5f677ac5
    2024/09/25 22:05:00 🐳 Creating container for image testcontainers/ryuk:0.9.0
    2024/09/25 22:05:00 ✅ Container created: eb0f86cd914d
    2024/09/25 22:05:00 🐳 Starting container: eb0f86cd914d
    2024/09/25 22:05:00 ✅ Container started: eb0f86cd914d
    2024/09/25 22:05:00 ⏳ Waiting for container id eb0f86cd914d image: testcontainers/ryuk:0.9.0. Waiting for: &{Port:8080/tcp timeout:<nil> PollInterval:100ms skipInternalCheck:false}
    2024/09/25 22:05:00 🔔 Container is ready: eb0f86cd914d
    2024/09/25 22:05:00 🐳 Creating container for image quay.io/microcks/microcks-uber:1.9.0-native
    2024/09/25 22:05:00 ✅ Container created: a7f410f91fb2
    2024/09/25 22:05:00 🐳 Starting container: a7f410f91fb2
    2024/09/25 22:05:01 ✅ Container started: a7f410f91fb2
    2024/09/25 22:05:01 ⏳ Waiting for container id a7f410f91fb2 image: quay.io/microcks/microcks-uber:1.9.0-native. Waiting for: &{timeout:<nil> Log:Started MicrocksApplication IsRegexp:false Occurrence:1 PollInterval:100ms}
    2024/09/25 22:05:01 🔔 Container is ready: a7f410f91fb2
    2024/09/25 22:05:01 🐳 Terminating container: a7f410f91fb2
    2024/09/25 22:05:01 🚫 Container terminated: a7f410f91fb2
    --- PASS: TestListPastries (1.27s)
    PASS
    ok      github.com/microcks/microcks-testcontainers-go-demo/internal/client     1.586s
    $ go test ./internal/test -test.timeout=20m -failfast -v -test.run TestBaseSuite -testify.m ^TestOpenAPIContractAdvanced
    
    $ go test ./internal/test -test.timeout=20m -failfast -v -test.run TestBaseSuite -testify.m ^TestPostmanCollectionContract
    
    $ go test ./internal/test -test.timeout=20m -failfast -v -test.run TestBaseSuite -testify.m ^TestOrderEventIsPublishedWhenOrderIsCreated
    
    $ go test ./internal/test -test.timeout=20m -failfast -v -test.run TestBaseSuite -testify.m ^TestEventIsConsumedAndProcessedByService
    Visit original content creator repository https://github.com/microcks/microcks-testcontainers-go-demo